ESP8266 and stability
24 March 2015 at 7:16 pm
Please note: this article is 3 years old. Since then a lot has happened to the ESP’s. They’re more stable since version 1.1x and they are now super easy to integrate with the Arduino IDE.
Like many others in the Maker Community I’ve spent a lot of time playing with the dirt cheap ESP8266 wifi chip. It is the cheapest way to add wifi to your project and it’s easy to get hold of. My hope was that it would be solid enough that I could build permanent installations and fun Internet Of Things (IoT) devices with it, but the darn thing keeps crashing. I’ve been testing it since the 0.91 firmware and all the way up to the current 1.0 version and it’s not possible to keep the device running for a prolonged period of time.
I’ve spent more than a weeks worth of time getting it to not crash at random intervals, so I thought I’d share what I’ve learned in case others find it useful.
Setting up for development
The best way to hook up these dev boards is to use the ESPlorer software (java) and getting a USB to Serial converter. If you have a version that offers 3.3V on both data and power lines (such as this one), it is the most convenient. If you can’t find a 5V USB to Serial, you should know that the Serial pins (RX/TX) are supposedly 5V tolerant, but the power must be 3.3V or you will fry the chip. The ESP modules will pull a couple hundred mA, so powering it from a good 3.3V power source such as a LM1117 / LD33 can be a good idea.
There’s many guides to hooking up the various development boards, so I won’t detail that part, but lets look at the software side of things! When you buy the ESP-01 breakout boards from ebay, you never know what version of the firmware it comes with. Most likely it will be an old one so you’ll probably want to update it. But - what firmware should you use?
NodeMCU
NodeMCU is a firmware that adds a LUA layer on top of the (somewhat stable) official 0.95 Espressif SDK. This seems to be the most stable firmware you can currently use and it is also the one that is the easiest to get started with. It is well documented and offers good tools. Rui Santos has a great guide for hooking up an ESP-01, burn the NodeMCU firmware and setting it up as a webserver.
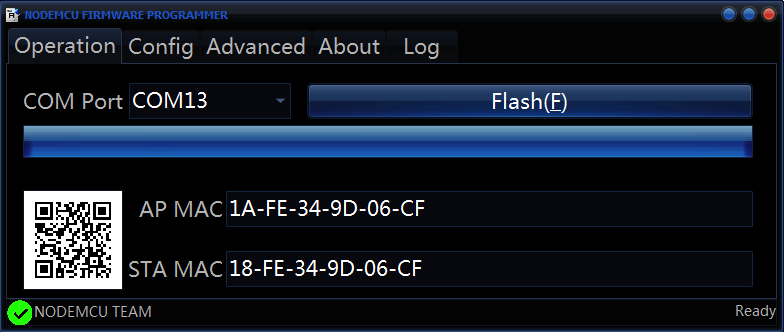
Briefly said, you hook up the ESP directly to a USB to Serial converter (3.3V!), download the NodeMCU Flasher tool, select the COM port and hit the Flash Button.
When that is done, download the ESPlorer software to talk to it. LUA is a very straightforward language to learn and if you’re used to closures like in Javascript, you’ll feel right at home. NodeMCU has a nice, documented API and several libraries that you can add for special hardware like LCD’s, WS2812/2811 LEDs, sensors and more.
The NodeMCU firmware is based on the original Espressif SDK and thus inherits all the bugs it comes with. This means that the hardware will crash just as often, but since it always restarts after a crash, it will re-run your LUA script on startup. This makes NodeMCU good enough for devices that will just send some sensor data to a webservice such as Thingspeak. It will not work as an access point doubling as a webserver though. It’ll crash and hang just as often as with the original firmware, so for me this is a showstopper. I want to make IoT gadgets that serve up a web interface as well as an open API.
Stock firmwares
Updating the firmware is quite easy if you use the NodeMCU Flasher. This has a nice, minimal GUI and everything is point and click. It’s Windows only though, so if you like Python, check out the esptool. All the officially Espressif SDK’s contain a “bin”-folder that has the precompiled files and a text description of what memory addresses to copy each .bin file into.
My initial idea was to use the UART in the ESP boards with a Microcontroller. Most my projects are based around the Teensy 3.1 and since it has 3 serial ports, so it’s a breeze to do UART communications with. However, no matter how hard I tried, I couldn’t make it 100% stable. After a few hours, it just crashed and restarted. It could run fine over night, but it would always crash after some usage. If there was a lot of traffic, it would crash more often and my intent was to basically bombard it with data continuously. I tried all the different versions of the firmware and even the official 1.0 version that was released this week is buggy beyond repair. It is actually so buggy that Espressif recently started an official bug-hunt...
That pretty much rules out using the official firmwares. How about making your own then? Espressif provides an SDK and the required code to compile your own version. Building it yourself is quite easy if you have a Ubuntu VM. Just follow the instructions outlined here. This will however not solve all your problems. Some of the codebase is Open Source, but other parts are provided as “binary blobs” so you can’t really know what bugs are hiding inside. You can however exclude those parts of the Espressif SDK that you suspect to be causing the problems, so if want to program the ESP8266 directly check this neat guide on Hackaday.
ESP8266-transparent-bridge
This “Transparent Bridge” is the solution I’m currently experimenting with. It’s a completely dumbed down firmware that can take a TCP connection on any port and relay it to the Serial port (RX/TX). Just apply power, connect to the WiFi access point that it sets up, Telnet to the default 192.168.4.1 address and you can set it up to join your local network / access point. You can then up the BAUD rate to whatever you want/need and change the Port to for example 80 to make it work easily with browsers.
Anything sent to the ESP will then show up on the Serial connection. When you write back to a connection, you can serve data (like a webpage). Currently, this seems to be the most promising solution, but it requires some more testing. The basic idea is to use as little as possible of the buggy Espressif SDK as possible. To get the ESP Transparent Bridge firmware onto the device, just load the premade .bin files using the NodeMCU Flasher tool like this:
![]()
I'#39;ll post back here when I have more details & results on this setup.
But why care if it’s buggy?
You might ask yourself - why on earth should one care about this chip if it is so buggy the creator has to host a competition to find all the bugs? The thing is - at $2 you can put wifi into ANYTHING! A typical wifi-shield for an Arduino will cost you from $30 and up to $90. Just a plain breakout board from Adafruit will cost you $35 and the CC3000 that it’s based on isn’t exactly stable either. A $2 chip that works would open up so many possibilities, so that’s why I still care after fiddling this much with it.
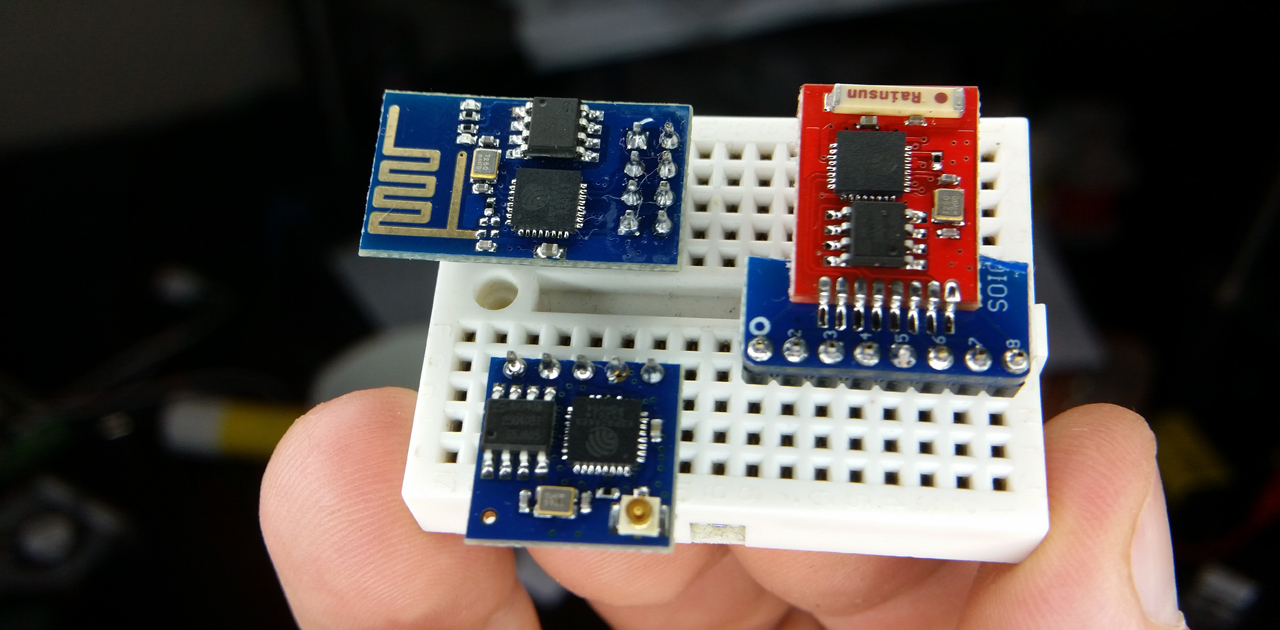
A little about the hardware
I presume that you already know a bit about the hardware if you’re reading this. If not, here’s some details. The ESP8266 is a small powerhouse and this is a small 101 on the hardware. It’s an ARM processor that runs at 80Mhz and can be overclocked to the double. It has up to 16 GPIO pins available and it does SPI, I2C, UART & more in hardware (fast!). It offers great range and you can get one for as low as $2 on ebay. Physically, it is a tiny 5 x 5 mm Integrated Circuit that needs a little supportive components around it to be useful. There is a series of dev-boards that offers this: ESP-1, ESP-2, ESP-3, ESP-4, ESP-5, ESP-6, ESP-7 and so on, all the way up to ESP-12. They differ with regards to pin spacing, internal/external antenna and the number of GPIO pins broken out. It was hard to locate all the pinout diagrams, so I’ve gathered them all in a github repository that I’ll fill with useful code and resources. The original datasheets has some decent info, but check the ESP8266 wiki for more details.
The ESP-1 is typically the cheapest and most available. It only has 2 I/O pins broken out and uses 2.54mm headers. They are however clumsily combined into a 2x4 arrangement making them impossible to breadboard. It’s not hard to make an adapter, but the ESP-2 is more practical for breadboard use. This also has a third I/O pin broken out, but requires an external antenna. The different versions all offer useful features, but the ones to avoid are ESP-5 and ESP-10. These do not have the pins required for updating the firmware exposed.
The version that seems to attract the community is ESP-12. It has FCC certification, RF-shielding, ADC and 9 GPIO’s. It is included in the NodeMCU devkit that you can now get from TronixLabs and several other Open Hardware vendors. I’m looking forward to getting a couple of these to play around with. Other devboards that look interesting are the new one’s from Olimex.