Filament review: Colorfabb XT
27 April 2014 at 1:46 pm

I've had a few really hectic months with a crazy amount of client projects. Hopefully that'll manifest itself on my bank account, but this weekend was my first few days of calm in two months. Time to play with the 3D printer again and experiment with one of my favorite filaments - ColorFabb's XT!
ColorFabb XT has been one of my favorite materials for a long time. In terms of properties, this PETG is sort of a crossover between PLA and ABS. As opposed to PLA, it is strong and quite flexible and it's much easier to work with than ABS since it barely shrinks at all. I've had varying results with it over time so I thought I'd experiment a bit with what are the best settings.
I first ran a series of tests to see how it's affected by speed (A), flow rate (B) and temperature (C).
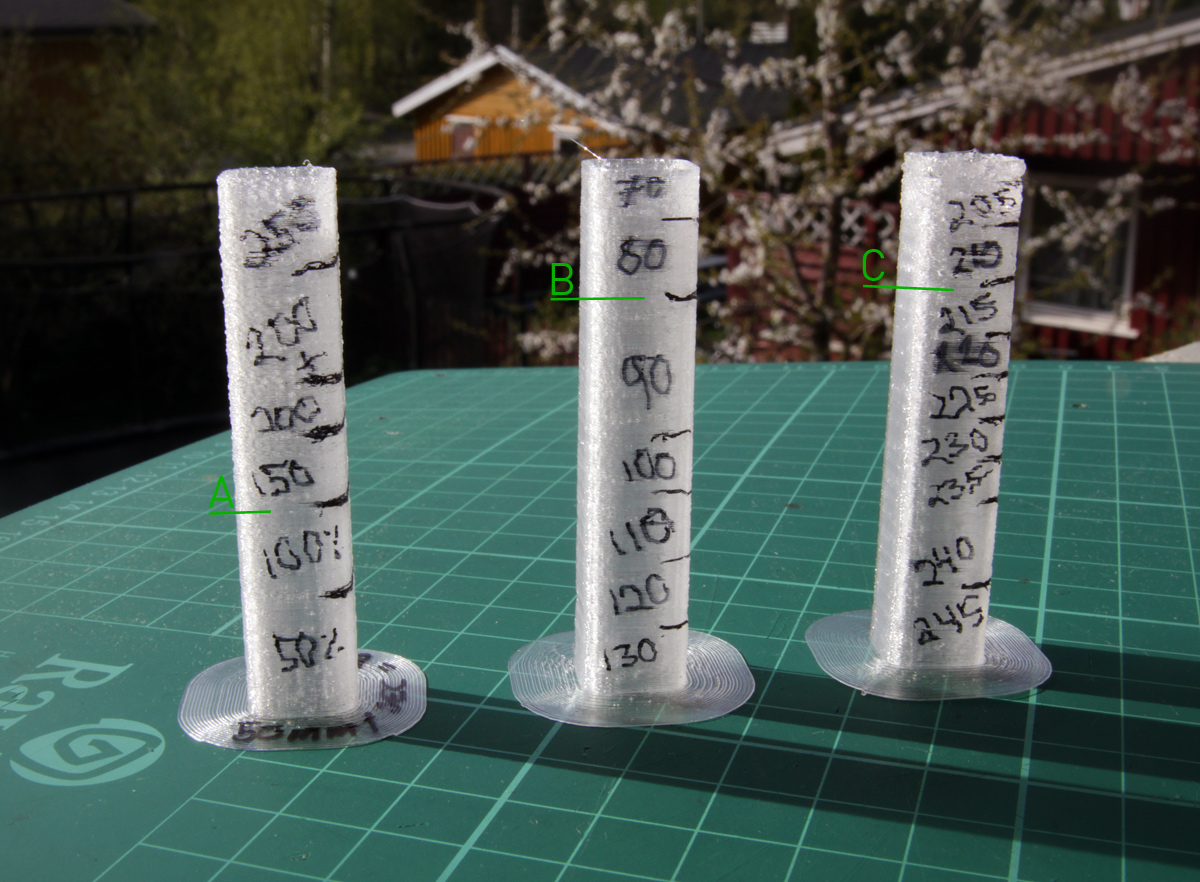
I started with a base of 50mm/sec / 235C and the output looks good at both 50 and 100% of that speed. As soon as you go above, you'll see the pillar becoming less transparent. This is due to small bubbles of air and indicates that it's not feeding enough plastic through the extruder. This could be compensated somewhat by increasing temperature, but it seems that 60mm/sec is about as fast as I can go. When it comes to flow, the output looks good even at 90%, but at 80% it suffers (as expected). Nothing really interesting there, and also not when it comes to temperature. The 220-240C that is printed on the box the filament arrives in, looks quite correct.
Transparency
One of the things I really like about XT is it's transparency. You can't really make it fully transparent, but you can get some very nice effects by calculating your model to have walls that are a multiple of your nozzle size. In the image below, you can see how thickness affects transparency.
![]()
The wall thickness is written below the different wall segments. Opacity is quite good when holding the object close to the XT, but as soon as the distance is increased opacity suffers. The upper piece is a shorter model with the same thickness, but it's standing upright. What is interesting is how much the slicer affects transparency. I'm using Cura 14.01 for slicing and it constantly calculates the feed rate for infills incorrectly. To get enough material when filling 100%, I have to increase the Flow Rate to 160%? This must surley be a bug in Cura, but you can work around it by setting the Shell Thickness (= # of outlines) to a very high amount.
Another observation is that you will get the best transparency when you have long, straight lines. Curves & corners will automatically give you less transparency.
A couple tricks and a breakthrough
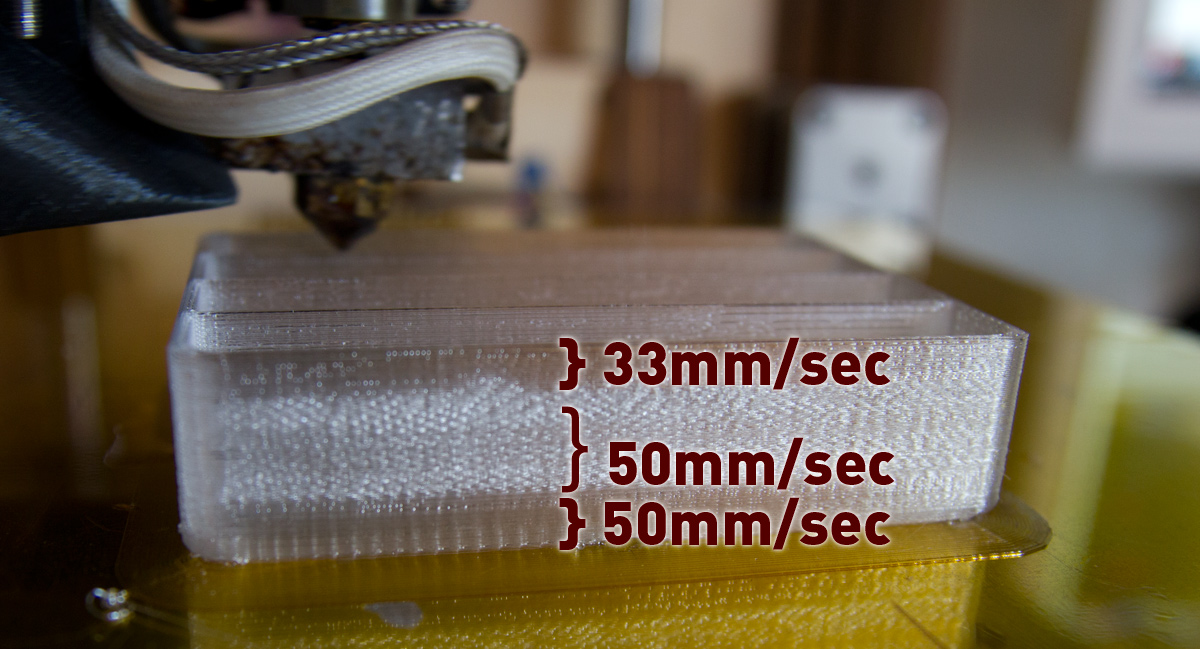
A hot tip if you get blobs or threads on the walls of your model, is to turn off Combing. This will force retraction on all moves and if your settings are otherwise correct, you'll completely remove the blobs. Another tip is that if the first few layers look good but the object then looses transparency, you can often save things by just slowing down a little as in the image below.
The biggest breakthrough I had in getting the XT to become clear, was after suggesting that Cura did not deliver enough infill. Daid (the maker of Cura) was quick to dismiss this possibility and I spent the whole evening doing more tests. After some cross-comparing with transparent PLA, I realized that Daid was completely right - no errors in Cura:
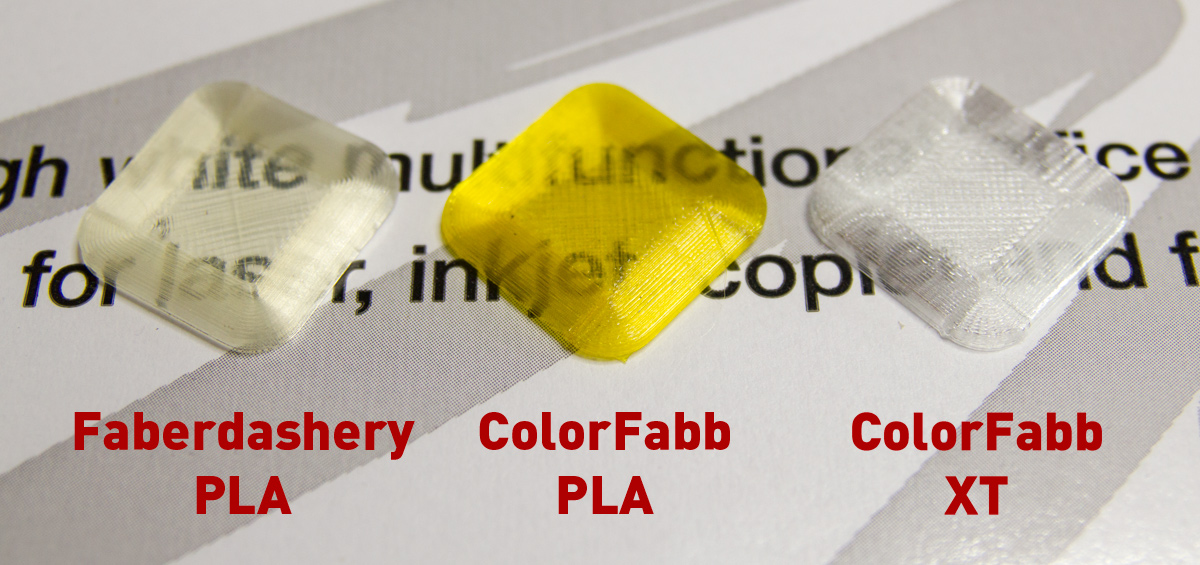
The first two of these are PLA and the last one is XT - otherwise using similar settings. Why was the XT so much less transparent? There were no difference? I then understood what the problem was. To get XT fully transparent - you cannot use the fan!
In the image below the first one (A) was printed with the fan turned off until starting on the walls of the box. The second (B) is the best I could do with the fan turned on. The third is the reason I had the fan on - unless the fan is on, you'll get small blobs along the wall (C).
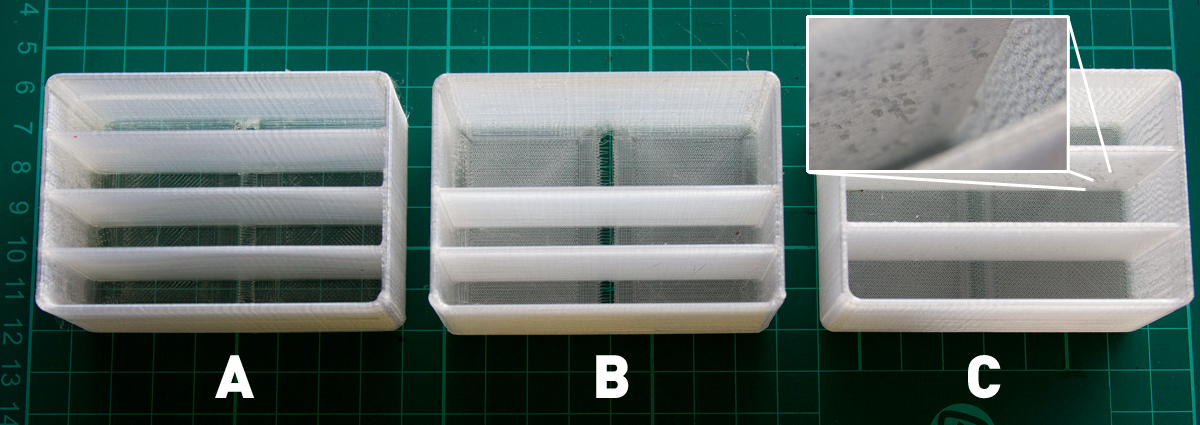
This is easy to solve however - Cura has a brilliant plugin-system that can turn the Fan on after either X layers or X millimeters of printing. Now, these boxes come out nicely every time!
So my magic settings for getting ColorFabb XT as transparent as possible - 35 mm/s, 235C, 105% flow & no fan for the transparent area. If you have a heated bed - crank that up as well as it'll help the layers blend by keeping the XT as hot as possible, so it blends better the next time the nozzle passes. Then you can crank up speed to 50 mm/s and turn on some careful fan cooling.
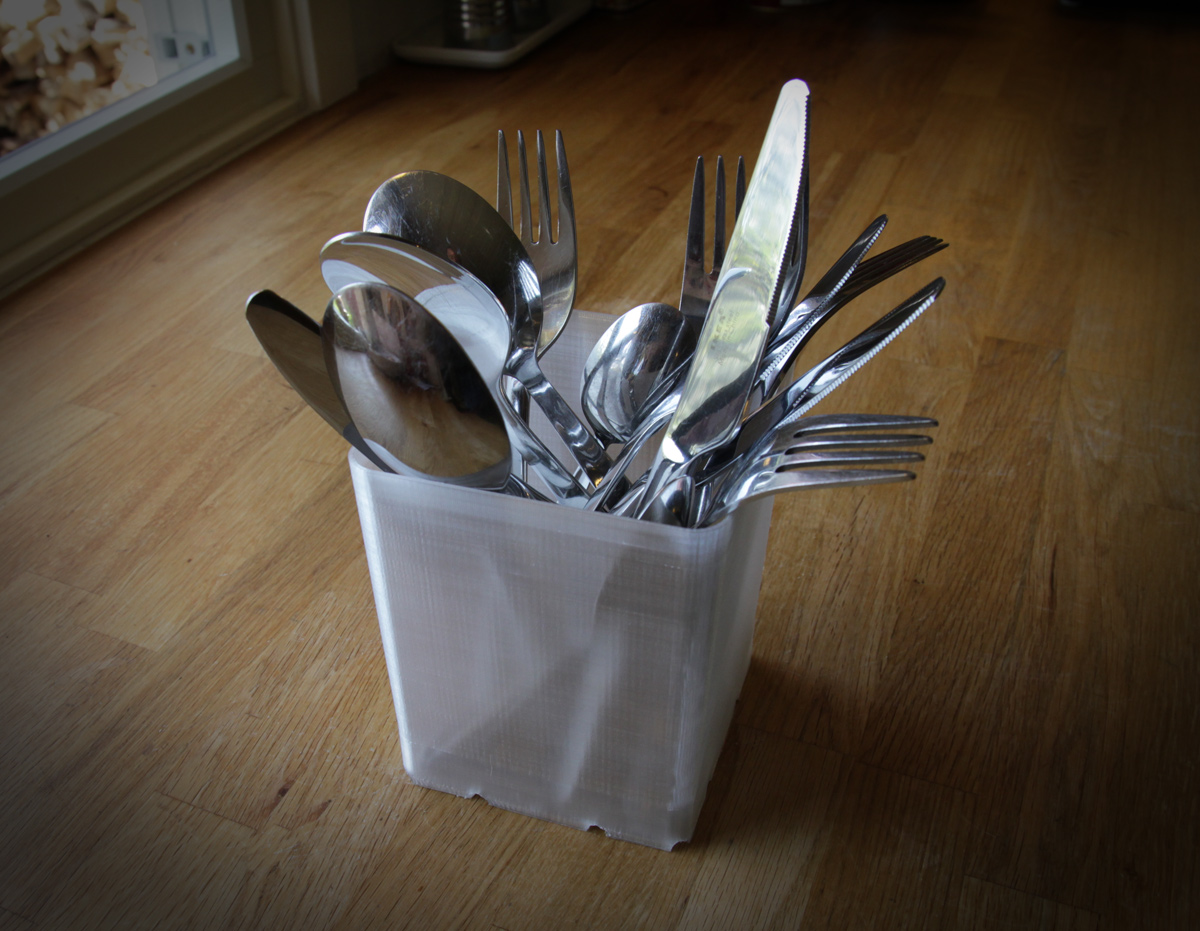
The reason I played around with this was to make a cutlery basket for my kitchen. Below you can see how it turned out and you can download and print the model here.