Heated Build Platform update
26 October 2013 at 2:57 pm
Since I published how I built my Heated Build Platform, it’s been by far the most read article on this blog. According to Google, it’s had more than 13.000 unique page views up until today and I regularily get emails regarding it. Time for an update!
Since the orginal article was published, I’ve changed the setup several times and I now have what I think is a pretty optimal solution. I should add that Ultimaker is also working on an official Heated Bed for the Ultimaker 1, but there’s no date yet for when it’s ready for sale. So - here’s my updated version on how to create a heated build platform for your Ultimaker.
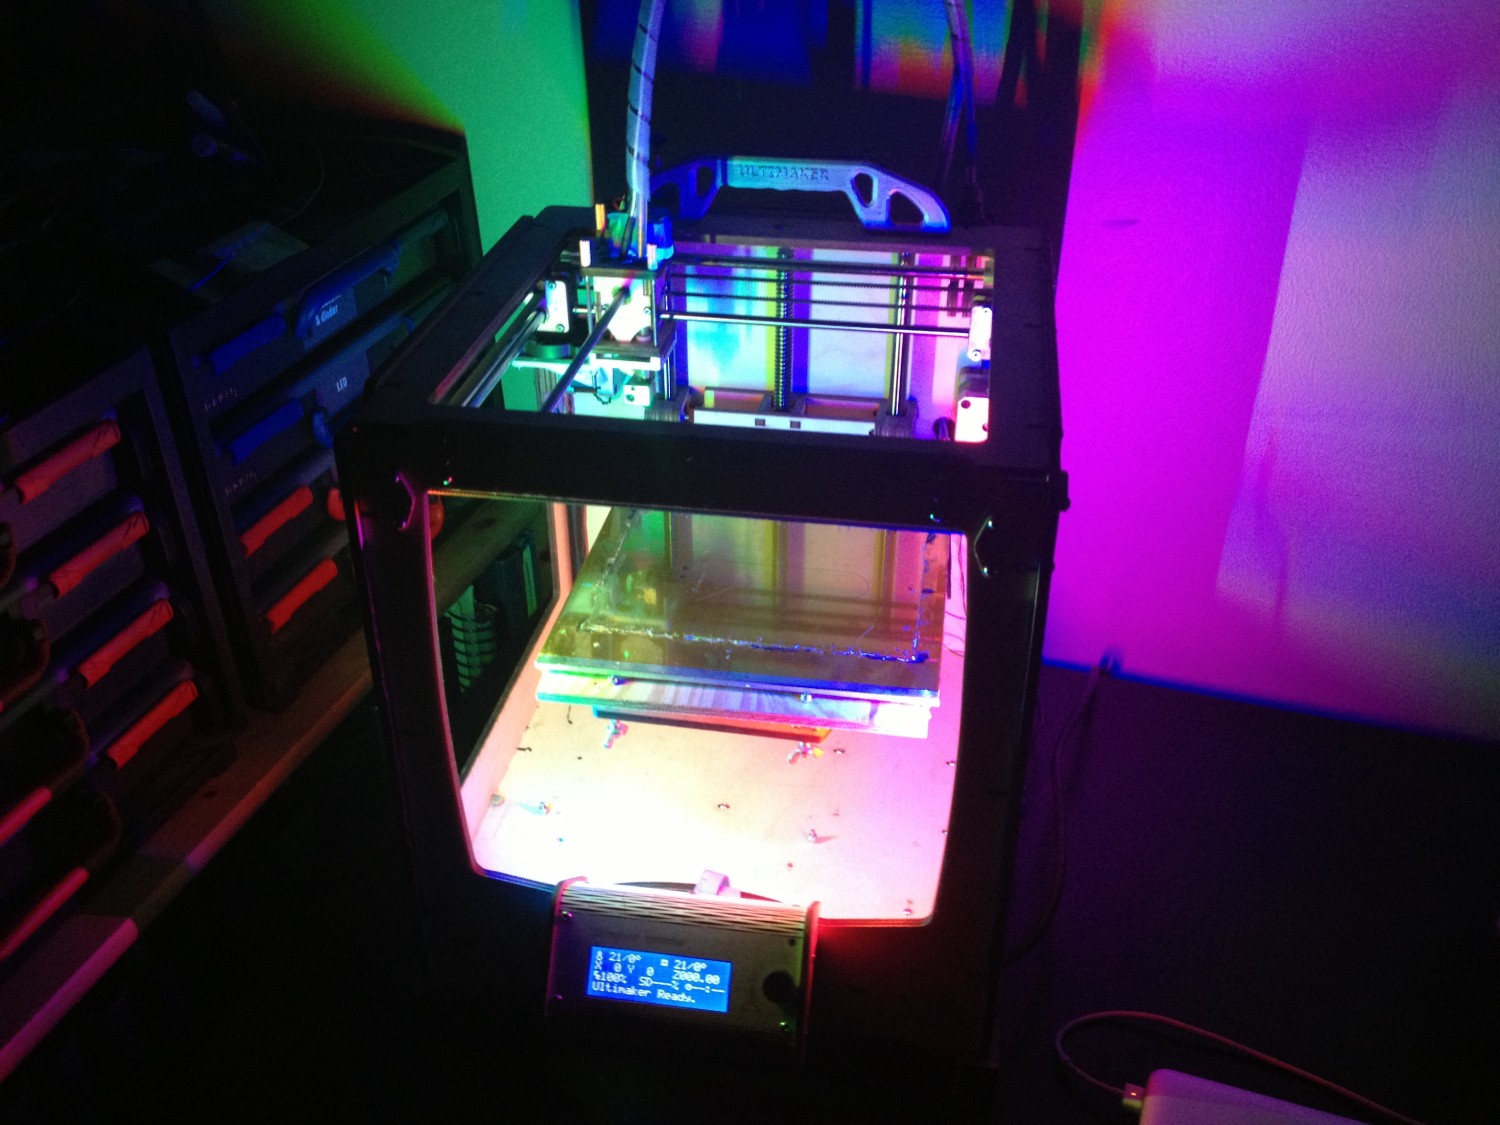
My current setup
The main change from my first setup is a more powerful Power Supply and an Aluminium build surface.
- 21 x 21 cm of 4mm Aluminium sheet ($60)
- Standard Prusa MK1 heated bed ($50)
- 100k Thermistor ($2.75)
- 4.7k resistor ($0.1)
- Relay + relay socket with cables, just as in the original setup. ($10.50)
- 12V / 360 watt industrial power supply ($40)
- wooden plate for mouning the MK1 onto
Mounting the Aluminium sheet was easy. I cover the aluminium with kapton tape, just as I did when I used a glass surface. 4mm appears to be the thinnest you can use without getting warping problems. 6mm is actually better and there’s little difference in how fast it heats up, so get that if you can.
I tried different power supplies before ending on the 12V/360w. These industrial types are much more efficient than an ATX supply and at $40 from ebay it’s also hard to beat the price. Finding one that would fit beneath the Ultimaker was the most difficult. I ended up just printing some extra feet to increase the distance, so the PSU had good clearing.
This is how the build surface setup looks:
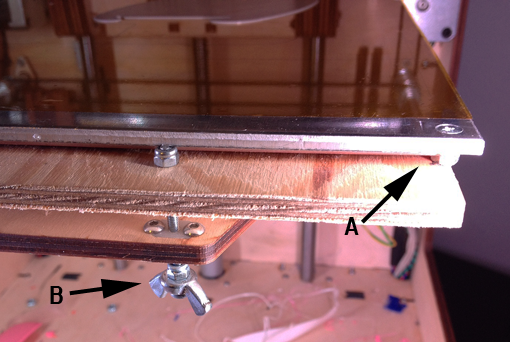
Note that the leveling screws (B) are at the bottom of the bed, making it easy to tweak the platform height while a print is running. This takes about 1.5 cm off the maximum height, but it’s easily worth it. A stop-bolt and a wing-bolt is attached to the bottom of the levelling screws for easy adjustment. The screws that attach the aluminium and PCB to the plywood (A) are counter-sunk into the aluminium, so there is nothing that the print head may hit.
At the bottom of the printer it looks like this.
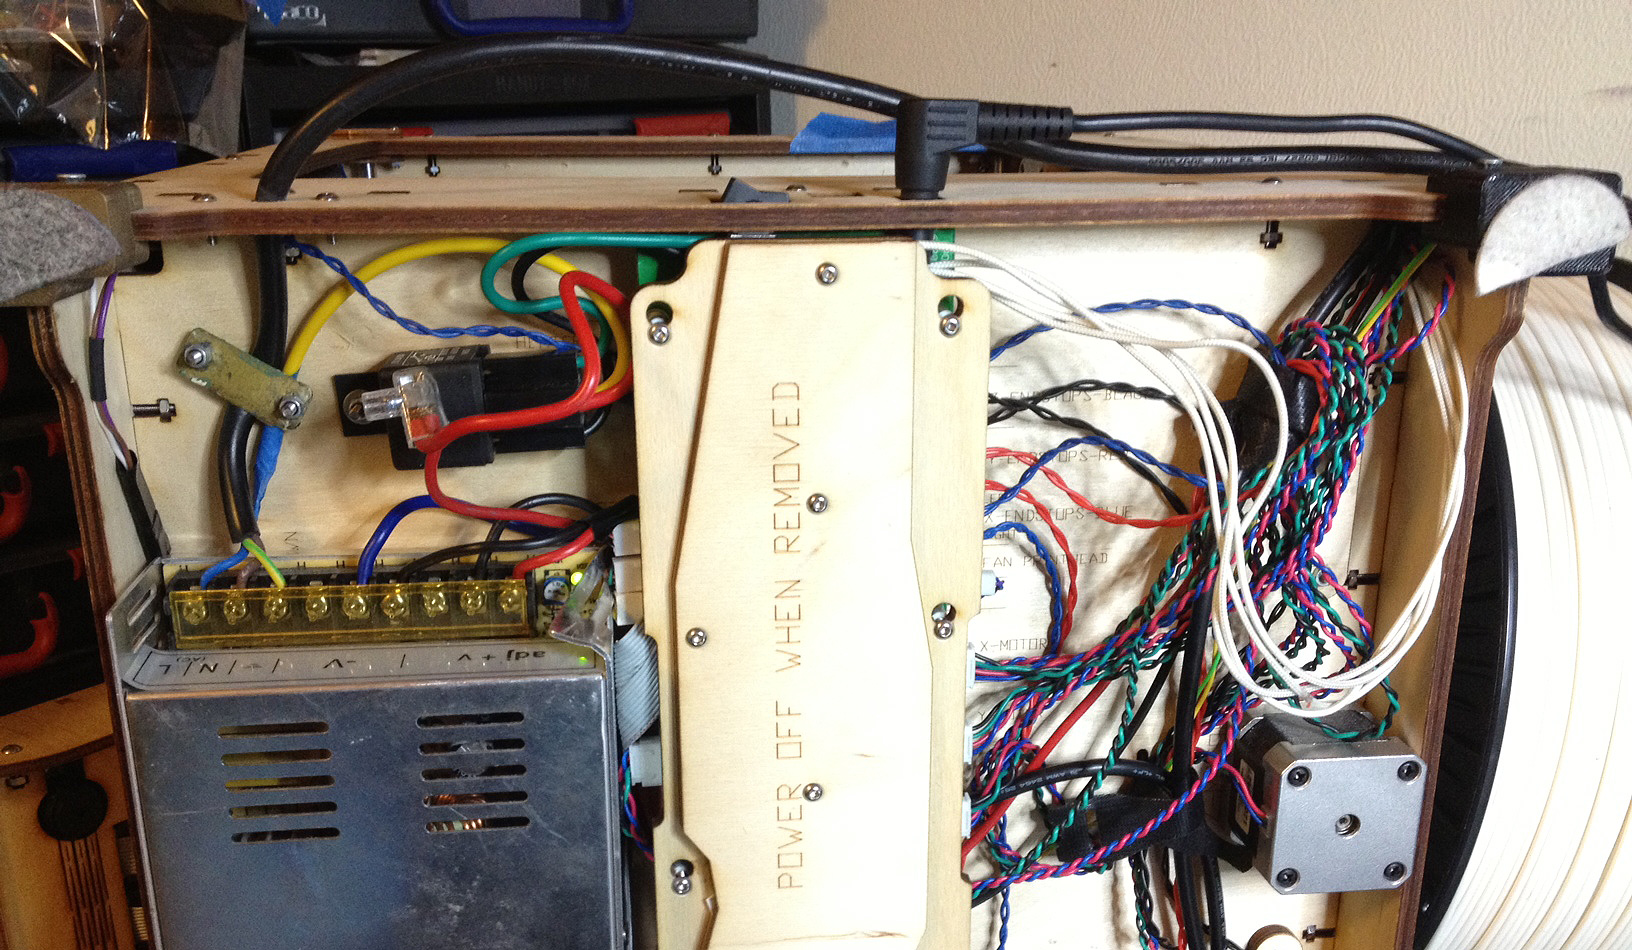
As you can see, the PSU mounts nicely towards the front of the Ultimaker. It takes 220v AC straight in, but I’ve added a strain relief to the cable to ensure it stays put even if someone stumbles on the cord. The 12V output goes through the relay to the heated bed, and it’s turned on/off by the Ultimakers heated bed output on the main PCB. This is pretty much the same as in my original setup, apart from the new PSU.
Since I now have a beefy PSU, I had to use some of all that power. I picked up some NeoPixels from Adafruit and pimped it up!
Now I have work-light when I need it and some bling when I don’t 😉
The only improvement I plan to this setup is to replace the Automotive relay with a Solid State Relay. All that’ll do is to remove the clicking sound when the relay turns on/off. It’s not much noise compared to the machine itself, but anything that can reduce the noise is worth a try.
Aluminium or glass?
Initially, I went the usual route and used a glass plate beneath the PCB heater. A architect friend of mine pointed out that glass actually resists heat and that’s why they use it for insulation. Good point, right? How about using aluminium instead he suggested?
How on earth am I going to get hold of aluminium was my first thought, but it turned out that all I needed to do was to call up a local metal shop. The price wasn’t too bad so I was seriously considering using Aluminium instead of glass. In the end I didn’t use the metal shop. A fellow Ultimaker user in Oslo was making an Alu plate for his own printer and he made a few extras so I could have one.
Here’s some of the things in favor for using an Alu sheet:
- I have fastened the 4mm alu with screws that are sunk into the surface. When you use a glass plate, you’ll need some sort of clips on the edges to hold it in place. The print head will sometimes hit these clips and it’s just annoying.
- Aluminium heats up MUCH faster than glass and more even heat distribution. Also - aluminium does not break like glass does 😉
- The Alu sheet can be slightly bigger than the PCB, so that you can still use the full 21x21cm that your Ultimaker provides. With glass, it MUST be the same size as the PCB (20x20cm) so it heats evenly. If not, it’ll break from the tension caused by the heat difference (since it resists it). I cracked two glass pieces due to this.
The only real drawback of aluminium are that it’s a little harder to find. The “hardness” is basically that you’re not used to visit hardware shops in your neighbourhood, but have a look. There should be one nearby as there’s metalworkers in pretty much every town.