Fixing avr-eclipse paths
20 August 2015 at 8:52 am
Just before summer, I started consulting work for a hardware startup here in Oslo. As part of this I’ve gotten to play around with and integrate lots of new toys such as VISA card readers and various communication solutions. I also inherited some AVR code for a circuit developed specifically for the project and yesterday I set up the tooling.
I guess I could have used all sorts of software alternatives to program the microcontroller, but since the people that created the codebase used Avr-Eclipse, I figured that I’d check it out. Using a GUI makes finding the right fuse settings a breeze and I love to have proper syntax highlighting and completion. Setting it up was easy using this guide, but getting the code to compile properly was somewhat difficult so I thought I’d jot down what I learned in case it helps others.
Setting path for AVR tools in Eclipse
All my problems boiled down to Eclipse not using the PATH variables for avr-gcc and avrdude. On my system I have CrossPack installed for working with pure AVR projects and then I typically use the Arduino tool + Sublime for anything Arduino-related. The Arduino tool automatically adds some things to PATH on the Mac/OSX so in theory, avr-eclipse should just find and use this. It didn’t. Instead it pointed to an old, uninstalled version installed by MacPorts on my old Mac that got ported over to my second Mac. All the folders were empty as I unsinstalled MacPorts to use Brew instead several years ago, but the “smart” feature insisted that these empty folders were better than looking at the system PATH variable. I altered the PATH values to point to the CrossPack installation but that didn’t help either.
The creators of the avr-eclipse plugin have tried to add some smarts to the configuration, but that failed completely for me. To set the correct location of the AVR tools you want to use, open the Eclipse menu > Preferences and then expand AVR > Paths like this:
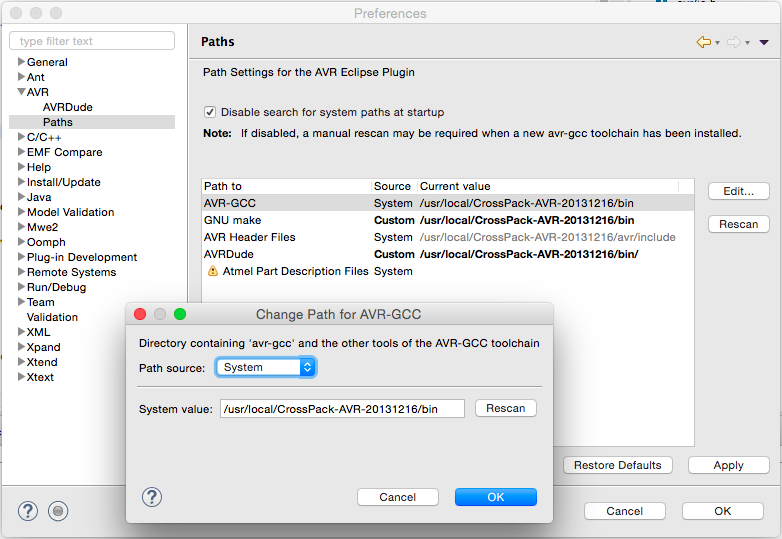
Forget the Rescan button if you know what path you want to use. If you don’t know the path to avr-gcc and the other tools, just open a terminal window and type:
which avr-gcc
This will tell you the path of the avr-gcc that can be reached through the normal PATH settings on your machine. Now you’d think that this is all you need to do, right?
Fixing the standard includes
I kept getting errors like this.
undefined reference to `debug' undefined reference to `asm'
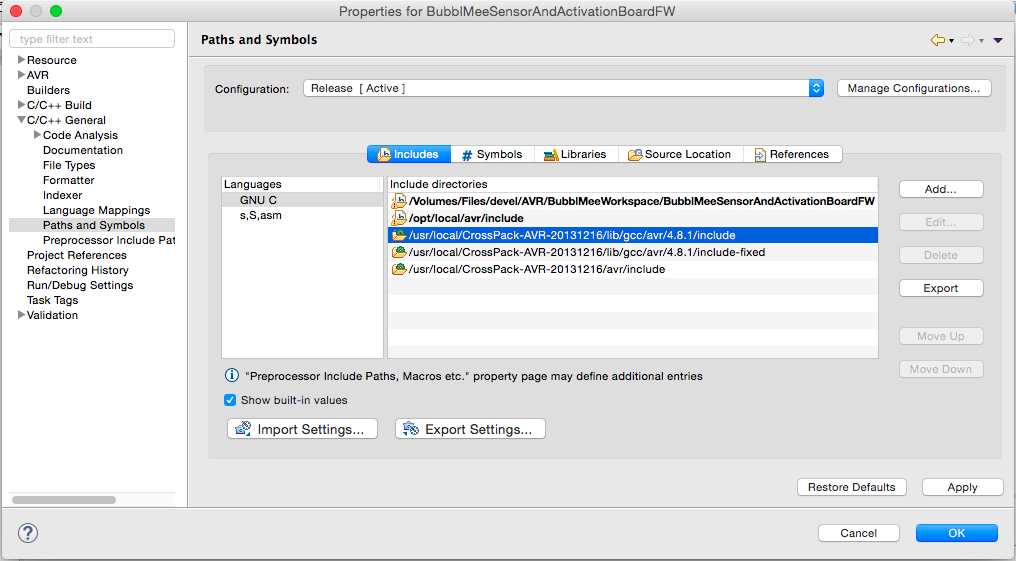
It basically means that AVR-eclipse can’t find the class definitions for these files. To fix it, Right Click the name of your project in the Package Explorer window and select Properties at the bottom of this menu. This brings up the local preferences for the project. Go to the “C/C++ General” entry and expand the “Paths and Symbols” option. Make sure you’re linking to the right version of the include files here:
If you’ve set the correct AVR hardware and the right programmer, you should now have a working setup. Hope this helps someone as it was rather hard to google all the bits required to get to this.