Buying a laser cutter for your Hackerspace
15 November 2015 at 8:48 pm
At my local Hackerspace, many of us wanted access to a laser cutter. I had plenty of ideas of what to use it for and it’s also one of the “Maker tools” that are the easiest to get started with. I started looking at DIY lasers like the Lasersaur project, but I felt like they were above my skill level and a little too big in size for our limited space. Now that we’ve purchased a laser cutter, I’ve gotten several questions from friends and other hackerspaces/makerspaces about the purchase process, how well it works and what to look for/avoid when buying a China-laser. Here’s some of my experiences.
Picking a brand & model
We tried to save up for a laser that we could buy from a local supplier, but it was simply out of reach. Then I started looking into Ebay lasers. Ebay lasers are 3-5 times cheaper than what the commercial suppliers offer here in Norway. The drawback is that they come without any warranty or support. I gave it some thought and decided that we really needed to have a decent laser @ Bitraf - both for myself and for attracting new members.
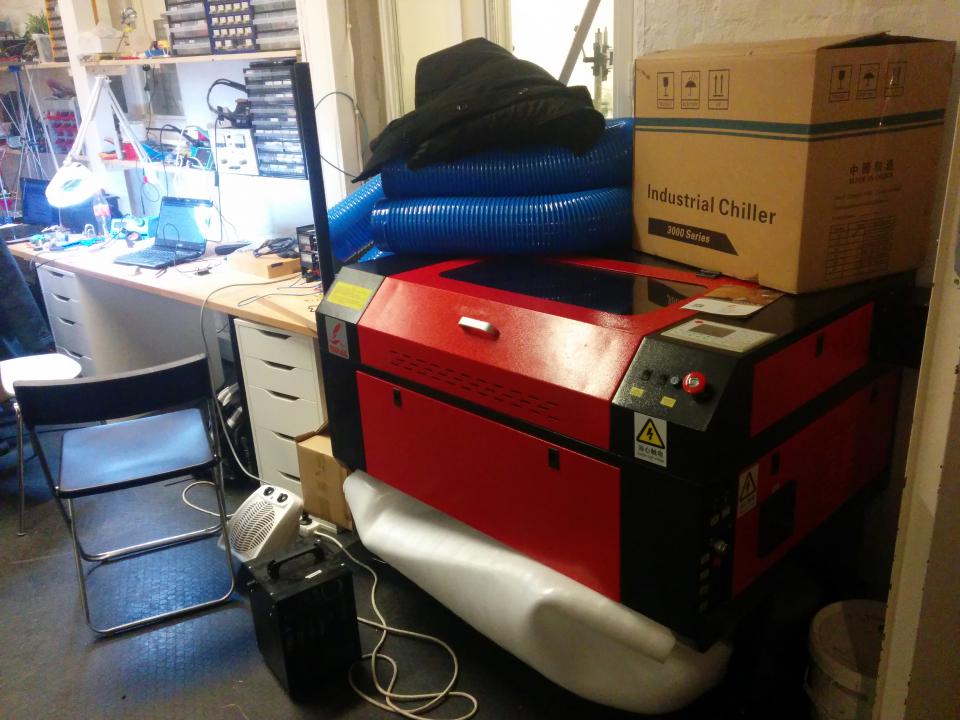
I scoured different forums, but CNCZone in special and looked for reviews of China-made laser cutters. After much reading, I opted for a Redsail X700. It has a 700x500mm work area, a 60 watt CO2 laser tube, motorised Z-height and that’s about it. They claim a lot of other features like auto-focus, but that’s not really true. It can move along preprogrammed X, Y & Z paths and blast a laser that moves at up to 300mm/sec. There is no way to runtime-adjust the strength of the laser. It’s on or off, but it runs off a PWM output so you can blast it for shorter or longer periods to “fake” that a bit. Setting the laser power on these cheap lasers are basically the same as setting the PWM frequency.
By comparison - a professional laser can tweak this quite a bit and even adjust the focal point at runtime. Using this, you can do a 2cm deep 3D engraving without leaving the wood burnt. With these chinese lasers you can easily engrave and cut at various “strengths” as well, but it’s something you set per object. The software that comes with China-lasers are also extremely crappy, but I’ll get back to that later.
Buying expensive stuff from Ebay
I looked around and there’s at least 5 companies on Ebay that sells the X700. You won’t find them by searching for the RedSail brand though, so search for “60W CO2 laser” and then you’ll see the listings. After looking around, I went for the ebay seller CNCCheap. I decided this based on the usual thing you do on Ebay, I looked at the buyer ratings. It turns out that this is highly irrelevant for anything that ships in a container and takes longer than the maximum review-period to arrive. This post is in many ways a review of cnccheap and I’ll tell you right away - they’re not the least professional.
Up until I transferred the money, the sales personell at CNCCheap were really snappy. I asked questions and got replies back by the next day. The list of standard accessories is quite long:
- Laser Engraving software Package (English Version)
- User Manual (CD)
- CW-3000 chiller
- Air exhaust fan
- Air Pump
- Communication cable
- 3 Reflect optics (installed in the machine)
- 1 Focus optics (installed in the machine)
- 1 60 watt laser tube
- Other tools
These are all things that you’ll need. The Chiller is crucial to keep the temperature of the CO2 laser tube where it should be. Water circulates inside the tube and keeps the fancy 3-layer glass tube at just above room temperature. The air exhaust fan and air pump (for air-assist) are also pretty much required, as are the rest of the list. They also offer a good list of accessories:
- Honeycomb
- Reddot Positioning
- Rotary tool
- Motorised up and down platform
- Extra optics
- Extra laser tube
I basically went for the “full package” of accessories with one exception - I did not buy an extra 60 watt laser tube. Why? I had learned that CO2 laser tubes only last about a year and then you have to replace them, so why keep a spare that you’ll only throw it away? Turns out this was actually my biggest mistake. More on that later, but always buy that spare tube…
It feels a little odd to buy something worth $3800 via Paypal/Ebay, but not to worry! Ebay has their buyers protection, Right? Just 4 weeks after I hit the Checkout button (and before the laser arrived), the purchase disappeared from my Ebay history. Repeated emails / tweets to Ebay’s support never resolved this and I never got an opportunity to leave my 1-star review of CNCCheap as a company. So - keep in mind - don’t select your laser supplier based on the Ebay rating. Look around for real-world cases of companies that offer good service. CNCCheap is not one of these. I ordered the laser the 11th December 2014.
Shipping and getting it in the door
I read about the shipping process online and it’s pretty straightforward. The seller will ship the laser to the nearest harbor and they’ll also help you organise the last part as well. A local shipping company will then pick it up when it arrives, do the paperwork and after you’ve paid them - they’ll deliver it to your door. Pretty straightforward. Due to unforeseen circumstances (these apparently happen all the time in shipping), the laser took quite some time to arrive in Oslo, Norway. I received the laser the 25th February 2015.
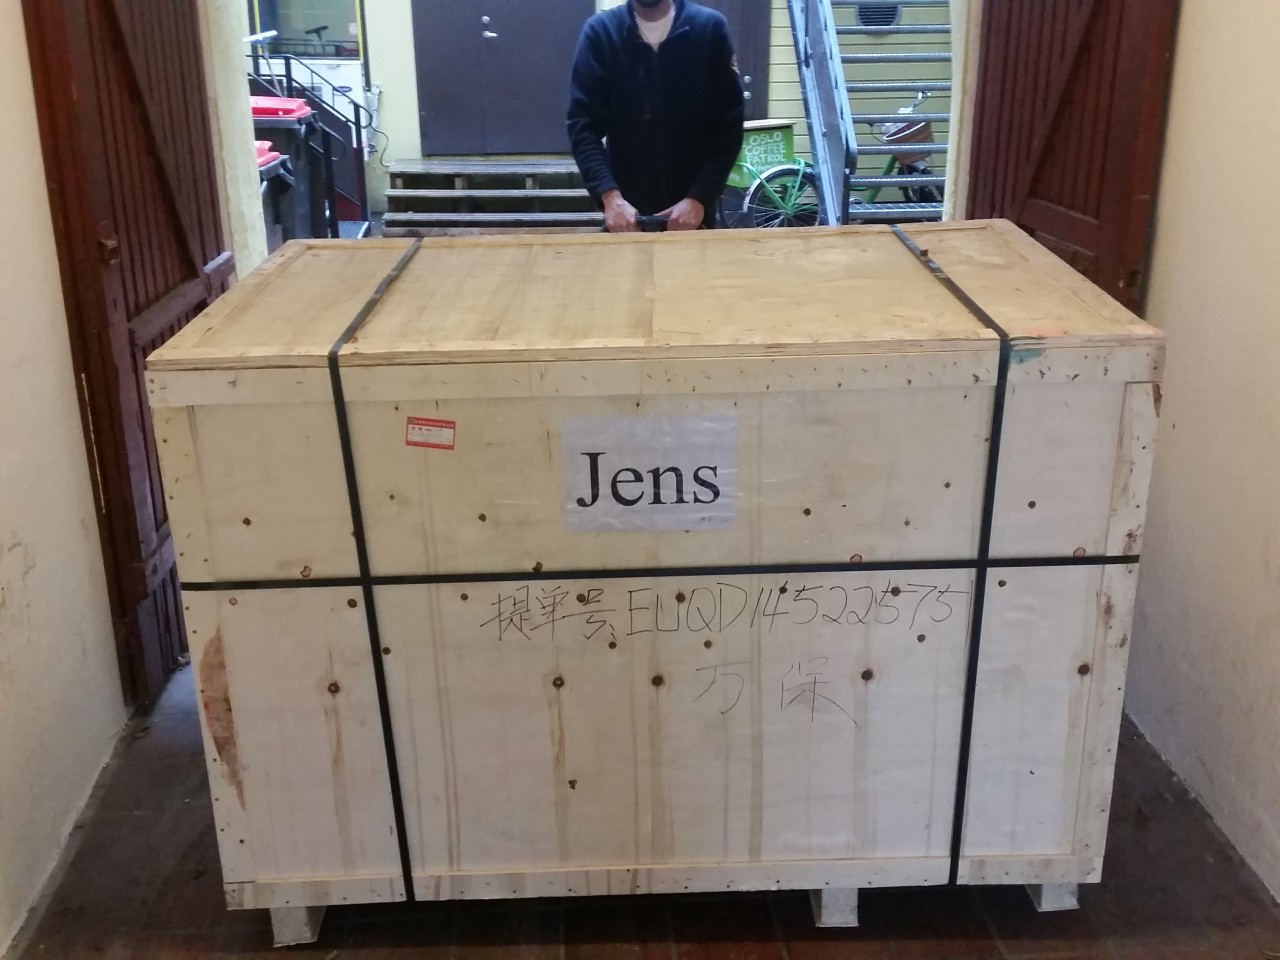
The package was huge! It was well packaged and secured and had no obvious damage. Unpacking the laser we quickly realised that getting it up the stairs would be an issue. One of the Bitraf members had one of these neat electrical trolleys for moving heavy loads up stairs. Immensely useful, so if you have stairs - find someone that has one of these!
Assembly and sparks flying!
Setting the machine up was easy enough. Not because of the incredibly crappy documentation offered, but due to some videos I found on Youtube (from RedSail, not CNCCheap). The documentation was 10 pages of assembly for a different laser cutter and then 120+ pages on a different software than what we received. The software itself (AutoLaser) was delivered on a recordable CD. So much for “original software”? Me and Jon assembled the machine the same evening but it didn’t work at all.
When we hit the Pulse-button, sparks flew about inside the laser Powersupply. A laser excites the gas inside the laser tube by shooting 27.000 Volts though it. You don’t want to be near it when this goes wrong. Here’s how it sounded:
The rest is a fairly long story that I’ll condense here for brevity, but a log is here (in Norwegian) and my chat-log with the CNCCheap salesperson Lucy is here. Here’s some dates and briefly what happened:
- 2015-03-15 We confirm by testing that the laser PSU is working and that it’s the lasertube that is dead
- 2015-03-16 CNCCheap was told about the problem. They recognised the problem and said that they would ship a new tube.
- 2015-03-25 The package arrives in Norway, but it’s declared as worth $5. We need a proper invoice to get it out and CNCCheap takes forever to supply us this
- 2015-04-07 We get the package and discover that they didn’t send a laser tube - they sent us another power supply?
- 2015-04-08 Despite solid proof, the seller refuses to send a new tube since they don’t believe us. I get tired of arguing and order a tube from someone else.
- 2015-04-14 New tube arrives and works on first attempt!
- 2015-04-15 CNCCheap is told about the working tube and they still protest. They even go as far as claiming that we are past the 3 month warranty. Then I explode….
- 2015-04-27 CNCCheap finally admits that the tube does not work, but insist that we smash the old tube. Apparently, they really don’t trust us despite our problems…
- 2015-05-04 Two and a half month after telling them about the defective tube, we receive the replacement.
Five and a half month after ordering it, we eventually have a working laser cutter on the cheap. We also realised that we never received the exhaust fan promised, but the non-working laser made that quite irrelevant. With the help of members Peter, Mubin, Kyrre, Vidar, Torfinn and Jon we finally got it up and running, but without their debugging experience from high voltage circuits I’d never make this. Thanks a bunch guys! I suggest that you find some allies that know a bit about high voltage circuits before buying.
Among the things we solved:
- The interlock switch was loose
- The safety connector to the chiller may be inserted the wrong way despite having a notch
- Soldering the anode and cathode wires are incredibly hard. Use stranded wire as shown in this instructable, wind it really hard around the anode and then solder. Don’t forget to add the isolation before soldering!
- If the display does not light up, check the red emergency button. It’s of really low quality.
Big thanks also go out to the other RedSail owners on CNCZone. They deliver much better support than the resellers or Redsail themselves. If you want to see how it looks when you intentionally break a laser tube, check the video below:
Breaking the old tube was a requirement from CNCCheap. They wanted to ensure that I did not try to fool them into sending me a new tube while the old one was actually working.
How we like it
Despite the incredibly unprofessional behavior from CNCCheap, we’re happy with the machine. You really should avoid CNCCheap at all cost and I truly think that RedSail should kick them as a reseller for treating customers like this. They are not the only bad reseller though, so be sure to check for good reviews by trusted sources.
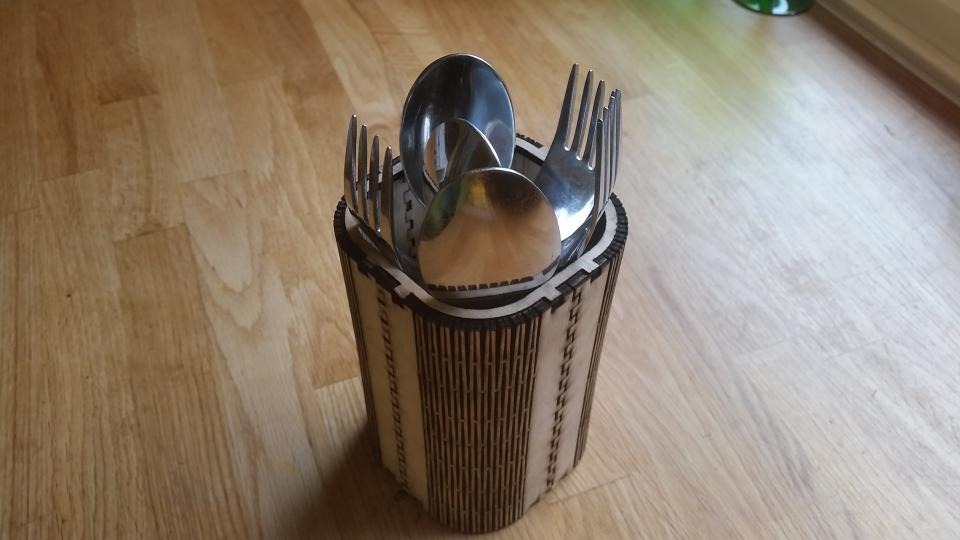
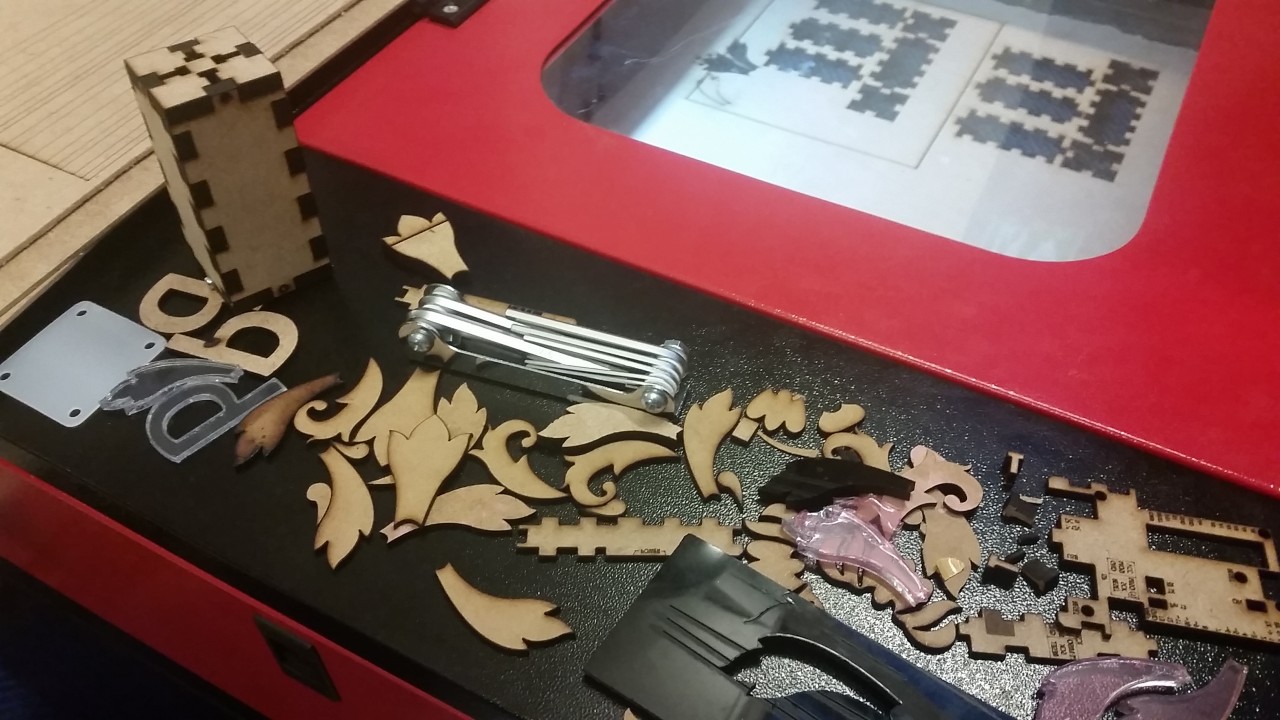
Overall I’m pretty impressed with what we can do with this thing given the price. We can engrave lots of different materials and we can cut the following with good results:
- 8mm clear acrylic
- 6mm MDF board
- 6mm plywood
- leather
These are the max thicknesses we’ve cut. Anything less also goes fine obviously.
The AutoLaser software is notoriously bad. It’s unstable and only imports DXF format without crashing. It does work fairly well apart from those very noticeable flaws. The undocumented meny system on the machine may seem like a joke as the English is very poor. There’s also three different “Enter-buttons” depending on what part of the menu you are in, so the usability of this thing is practically zero.
The most important thing you need to know is that “Back” actually means “Home” and that the X700 has several undocumented (but nice) features. To zero the X-height on the material, you either click 12 times in the crazy menus, or use the undocumented command of pressing the dot-button and then pressing Enter. To show the outer bounds of the area to be engraved, press the Range-button and then enter. There might be more of these, but it’s hard to tell. These we stumbled on by random chance.
We started using the machine without a filter. Then I built a DIY filter. It did well for a while, but now we’re getting a commercial grade filter. My self-built filter sent all the warm air out of the building. This is convenient during summer, but not so much during winter. The commercial filter will clean the air enough that we don’t need to vent it outdoors.
Below is a video of the most elaborate project I’ve made thus far. It’s a timing gate for the Nerdy Derby race at Teknisk Museeum in Oslo. I learned quite a bit from that - but primarily that objects made of laser cut wood should not be in public spaces were kids run around…