Printrbot Jr - built by Jr!
05 December 2012 at 6:05 pm

My son loves hacking and I’ve thought about getting a second 3D printer. I figured, this could be a fun activity for the two of us. The idea is to have this one in the office, while my Ultimaker stays at home. I’ve followed all the Kickstarters that involve 3D printers and thus far, only one has really delivered - the Printrbot. The kit I decided to get was the Printrbot Jr.
The PrintrBot Jr is the cheapest kit out there and I was really curious to see what kind of printer you could get for just $399. They also sell it Pre-Built for $449, but we wanted to put it together ourself. The instructions and videos supplied are reasonably good, but at many places you just had to guess and see if things were right. There were also some screws missing, but I found replacements. The stupid thing was that the supplied screws were mostly american sizes so it’s hard to find the correct replacement screws unless you’re in the US. I got it to work and I’m happy with that, but I wish they had counted correctly in the first place. Also missing is all the tools required, so make sure you have the following:
- Umbraco’s (2mm and 4mm)
- A little wood-glue
- Blue painters tape for the bed
- Unless they update the kit, you’ll also need the seven 1/8” 40mm bolts (that were missing in my kit). I used 3mm as replacements, but it’s not ideal.
- There is also no filament in the package, so order a Rainbow pack from Faberdashery or something to get you started.
To get the most out of your printer, you should also get:
- 40mm fan (you’ll find this in any decent computer store)
- Micro SD card. A small one (2-4Gb) will do
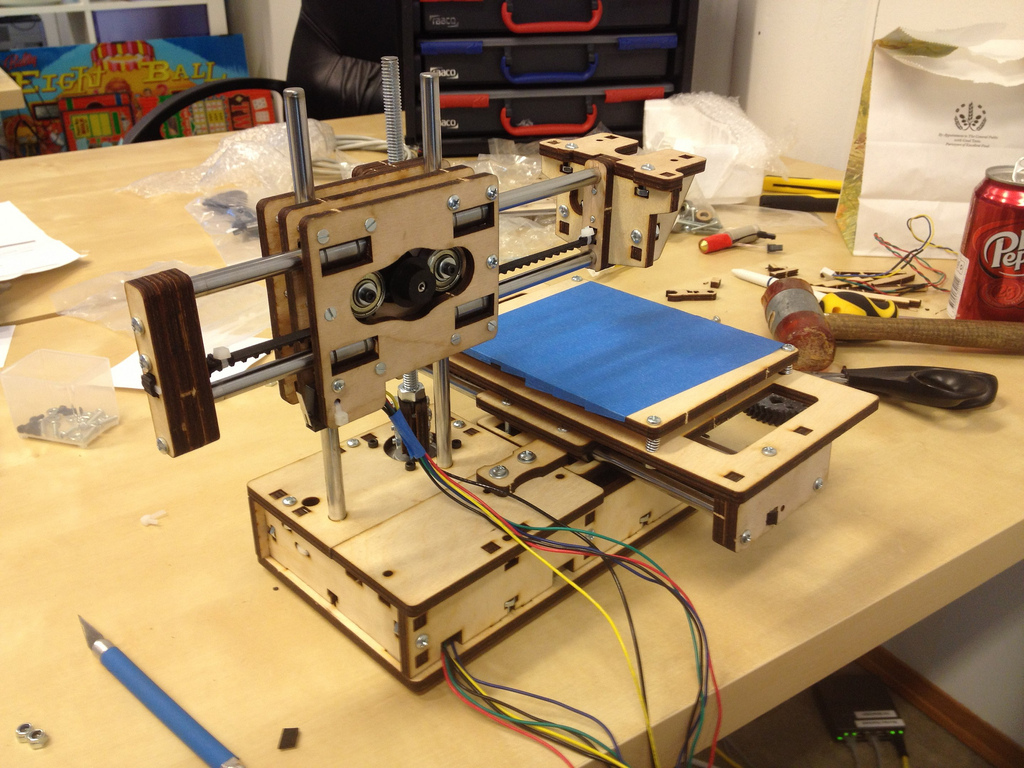
What I missed the most was good pictures of how the extruder fits onto the rest of the assembly, so I took some pictures that I have posted on my Flickr account of how this is supposed to look. Here’s how you mount the hot-end and here’s how the motor assembly should be. Assembly speed wasn’t amazing (compared to the Ultimaker), but hey - my son did almost 70% of it himself and he’s only 11! Not shabby at all. And with a little better instructions, I’m sure he could have done it all himself.
We’re still to get a print out of it, as the software side is a bit rough. We got everything working with Printrun/Pronterface but we didn’t get anything sliced to print. That’s the part where companies like BfB and Makerbot has a big advantage. They have a complete end to end solution, whereas the Open Source printers also use an Open Source toolchain. I’ll post images of the first prints when we have time to set up Slicer. If you’re setting up a Printrbot Jr, be sure to check out the rest of the pictures of Flickr so you can see how to mount the extruder to the printer.
Update: Now printing!
After following the official Getting Started Guide, we’re now getting decent prints! I just tried printing this Thing and it highlighted another thing that is missing with this printer - a proper PLA cooling fan. It’ll be incredibly hard to get anything good looking without it, so I guess that’s where I’ll start…