CAN can (how to debug a CAN setup)
13 December 2020 at 5:42 pm
I recently started a project using CAN and I did some rookie mistakes that I thought I’d share so others don’t do the same.
For many of my projects that don’t require Wifi, I’m using Teensy as my base. I have a good base design that I’m basing several things on and it really removes a lot of development pain to use such a well supported and maintained platform.
Understanding CAN & OpenCAN
Before starting this project, I mostly knew about CAN from the use in cars. It is however the basis of many industrial control systems and is used in anything from small cars, to airplanes and oil platforms. In my project, I’m using motor drivers from Maxxon and these use a CAN variant called OpenCAN. OpenCAN is based on CAN, but has specific rules for how to fill the packets with data. To understand how OpenCAN works, I found this video series immensely useful.
There is no OpenCAN implementation for Teensy or Arduino that is actively maintained that I know of. The closest is CANFestival but that is GPL licensed and not maintained (most repos linked are dead). It looks like most of these die out since they’re not actively being used & maintained, but my current conclusion is that this does not matter that much? Given a good example to look at like this one, I’m sure I can make a good lightweight solution. Should be some interesting weeks ahead!
Setup the BUS
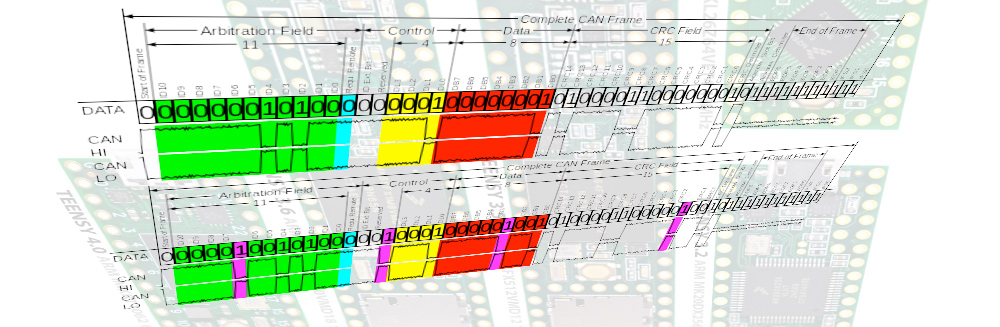
A CAN bus is basically two wires that is terminated with 120 ohm resistor at both ends. The wires are called CAN High and CAN Low, with the name indicating the potential they should be at. CAN H goes from 1.5V to 3V (0/1) and CAN L goes from 1.5V to 0V for 1 and 0. Yes - this makes it differential like RS485 and quite resilient to noise.
You can then tap into the CAN H/L wires (the BUS) with short wires (stubs) that connect to your devices. In most setups, you’ll have a master device at one end of the bus, but you can have it anywhere along the two wires. In more advanced high speed OpenCAN FD setups, you can have multiple Master devices, but in my case I’m limited to the first version of OpenCAN).
To figure out if you’ve setup your CAN bus correctly, you should measure your CAN H/L lines using a Multimeter (as learned from here):
- Measuring resistance, you should measure close to 60 ohms across the CAN H/L lines if all is good. 115-120 ohm if one termination is missing
- Measuring voltage, both CAN H & CAN L should be close to 1.5V when nothing is happening on the BUS (relative to GND). If the bus measures close to 0V, you may crossed the CAN H/L lines (I did and it cost me needless hours)
CAN Controllers and Transceivers
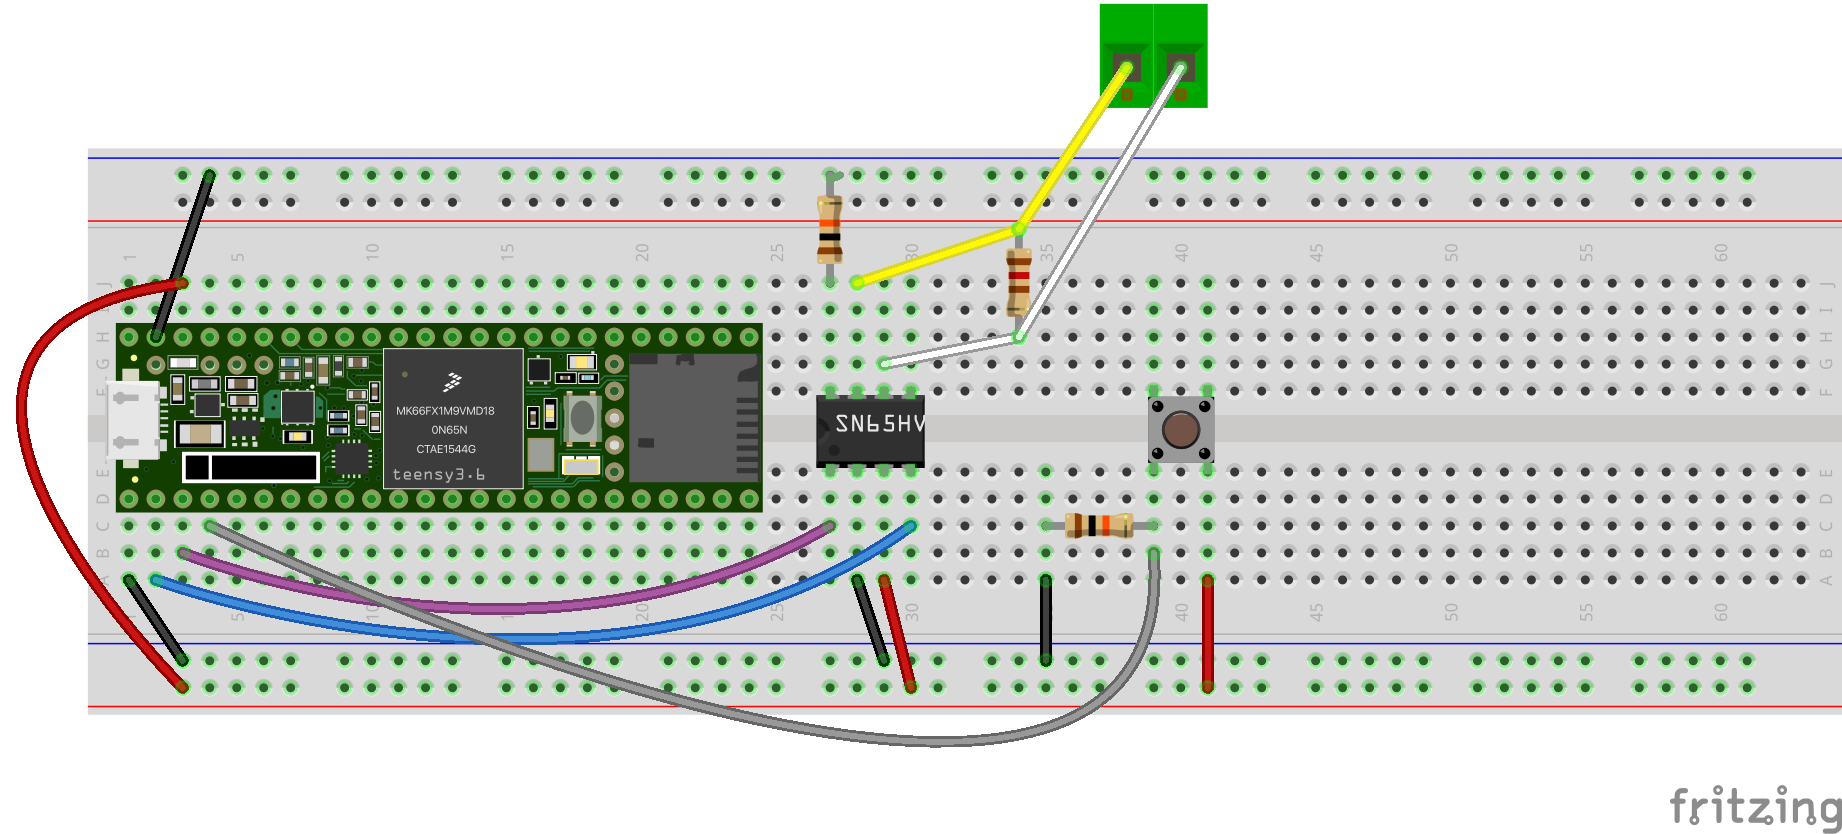
To create the differential signal (1.5V for a LOW and 3V or 0V for a HIGH) it’s convenient to use a dedicated chip. Many of the examples I’ve found are tied to the MCP2515 from Microchip That chip is SPI based, but since the Teensy has CAN capable ports, I have opted for using the SN65HVD230. I’ll use this with the FlexCAN_t4 library and just write text as if it was normal uart/serial communication. The library is really well maintained and supported by Antonio Brewer. I’ll update this post at a later time with more details on how to use Teensy with CAN, but it’s been a good experience thus far.
Here’s my simple test setup for now: