Covid streaming setup
27 February 2021 at 2:34 pm
Thus far, I’ve done really well when the students grade their lecturers at Høyskolen Kristiania. I guess I’m lucky since my topics (Embedded Systems and M2M Communications) are very hands on and I get to start each year by handing out electronics kits. With Covid looming on the horizon, I wanted to up my game in case I had to start doing streaming lectures, so I rebuilt the desk in my home office to become a combined Electronics and streaming station.
I had long thought about getting a video mixer so I could easily toggle between my microscope and my computer on the 10” screen I built into my desk a year ago. Just before Europe closed down in March 2020, I ordered the last ATEM Mini video mixer available in the US (the last one in EU was sold two weeks earlier).
Figuring out the setup
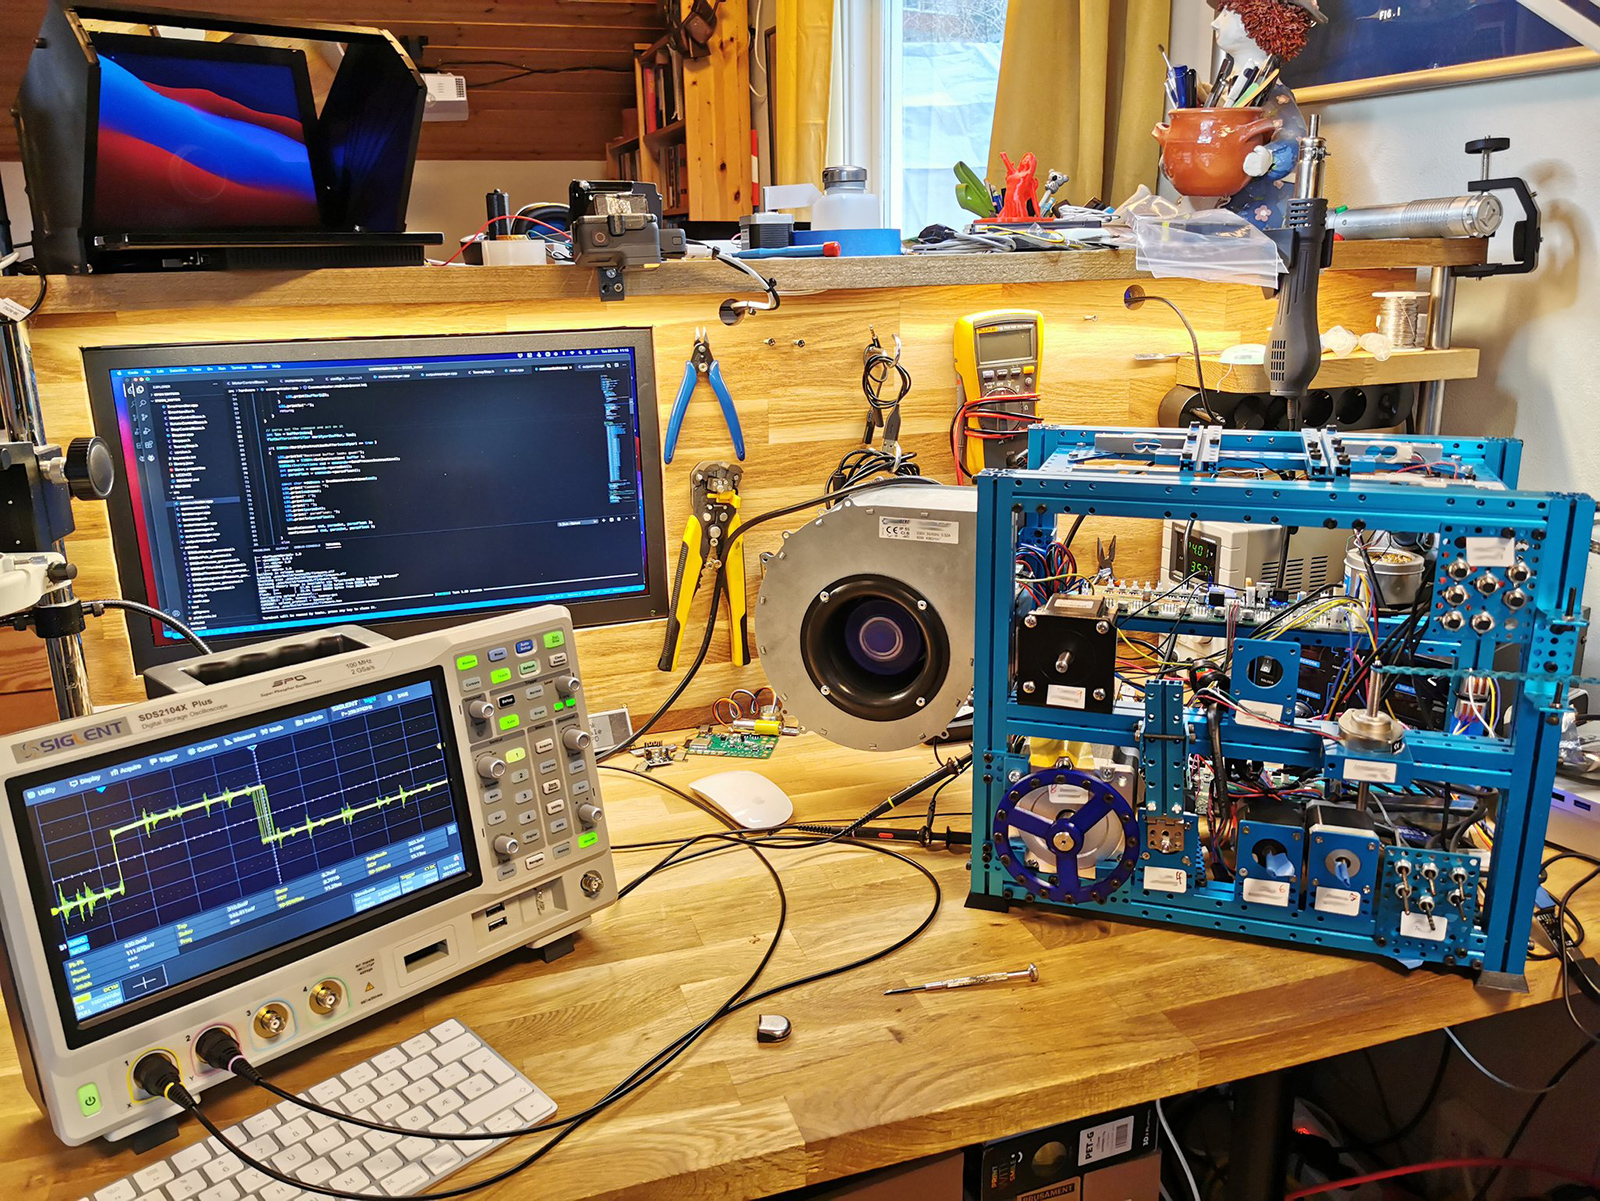
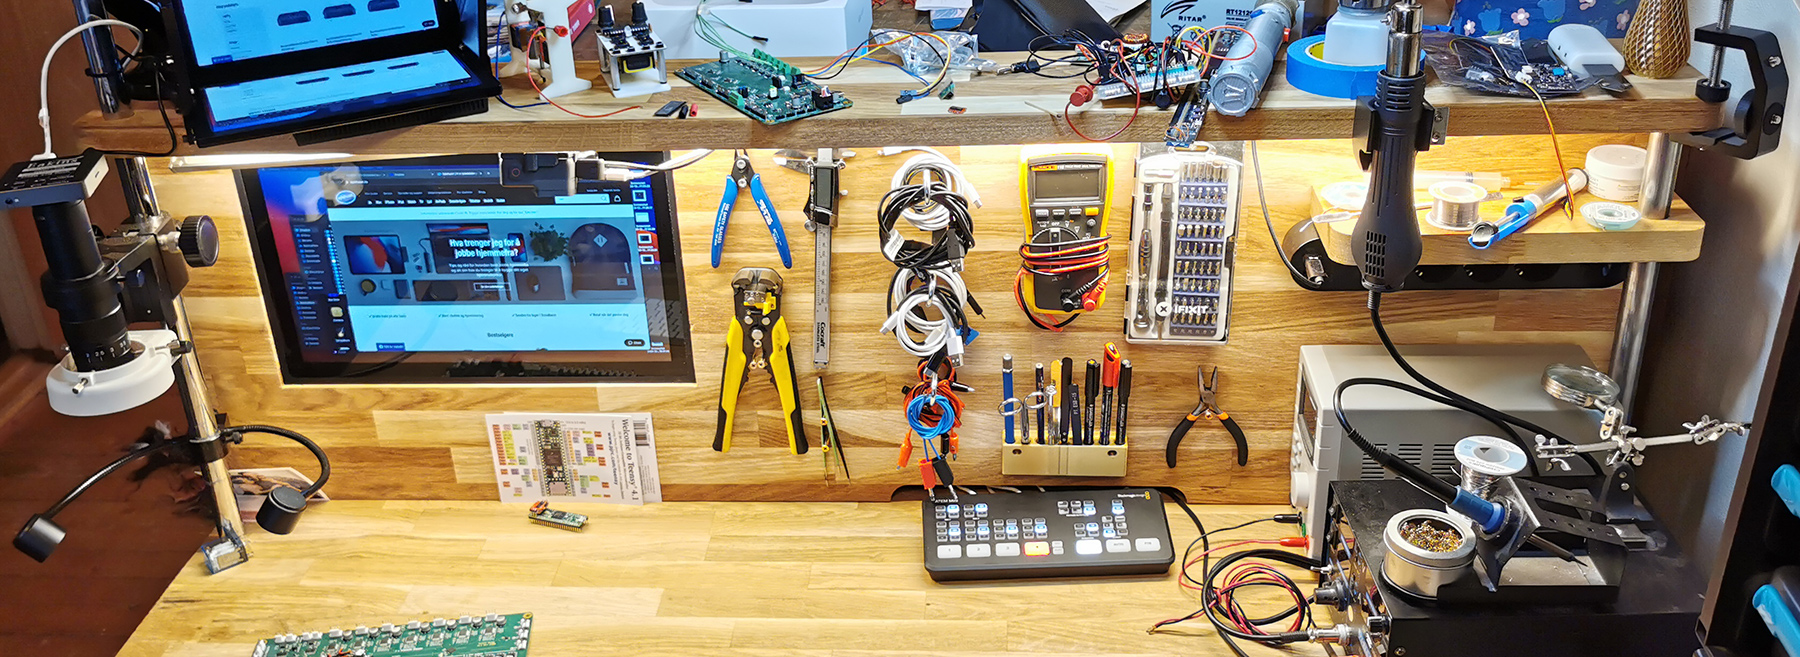
I rebuilt my entire workbench around the video mixer. I kept my common electronics tools easily available, but upgraded to a larger 19” screen (5) over the 10” I had originally. I 3D printed my own Teleprompter (2) to work with the old 10” screen. I took a cheap 18x23 cm picture frame and added a layer of mirror foil to it. Worked like a charm! I picked up a used Lumix GH4 camera and placed it behind the Teleprompter, so when I’m reading my slide notes I’m looking straight into the camera. This makes you look a lot more professional on a stream, since the viewer will get the perception that you’re looking at them rather than looking down at your screen.
I bought a (slightly too big) video light (1) from Godox called LEDP120C. This allows me to adjust the color temperature using a remote. I already had a 720p microscope built into the desk, but I’ve now upgraded this to a 1080p version (4) so all my video sources are 1080p @ 60 fps.
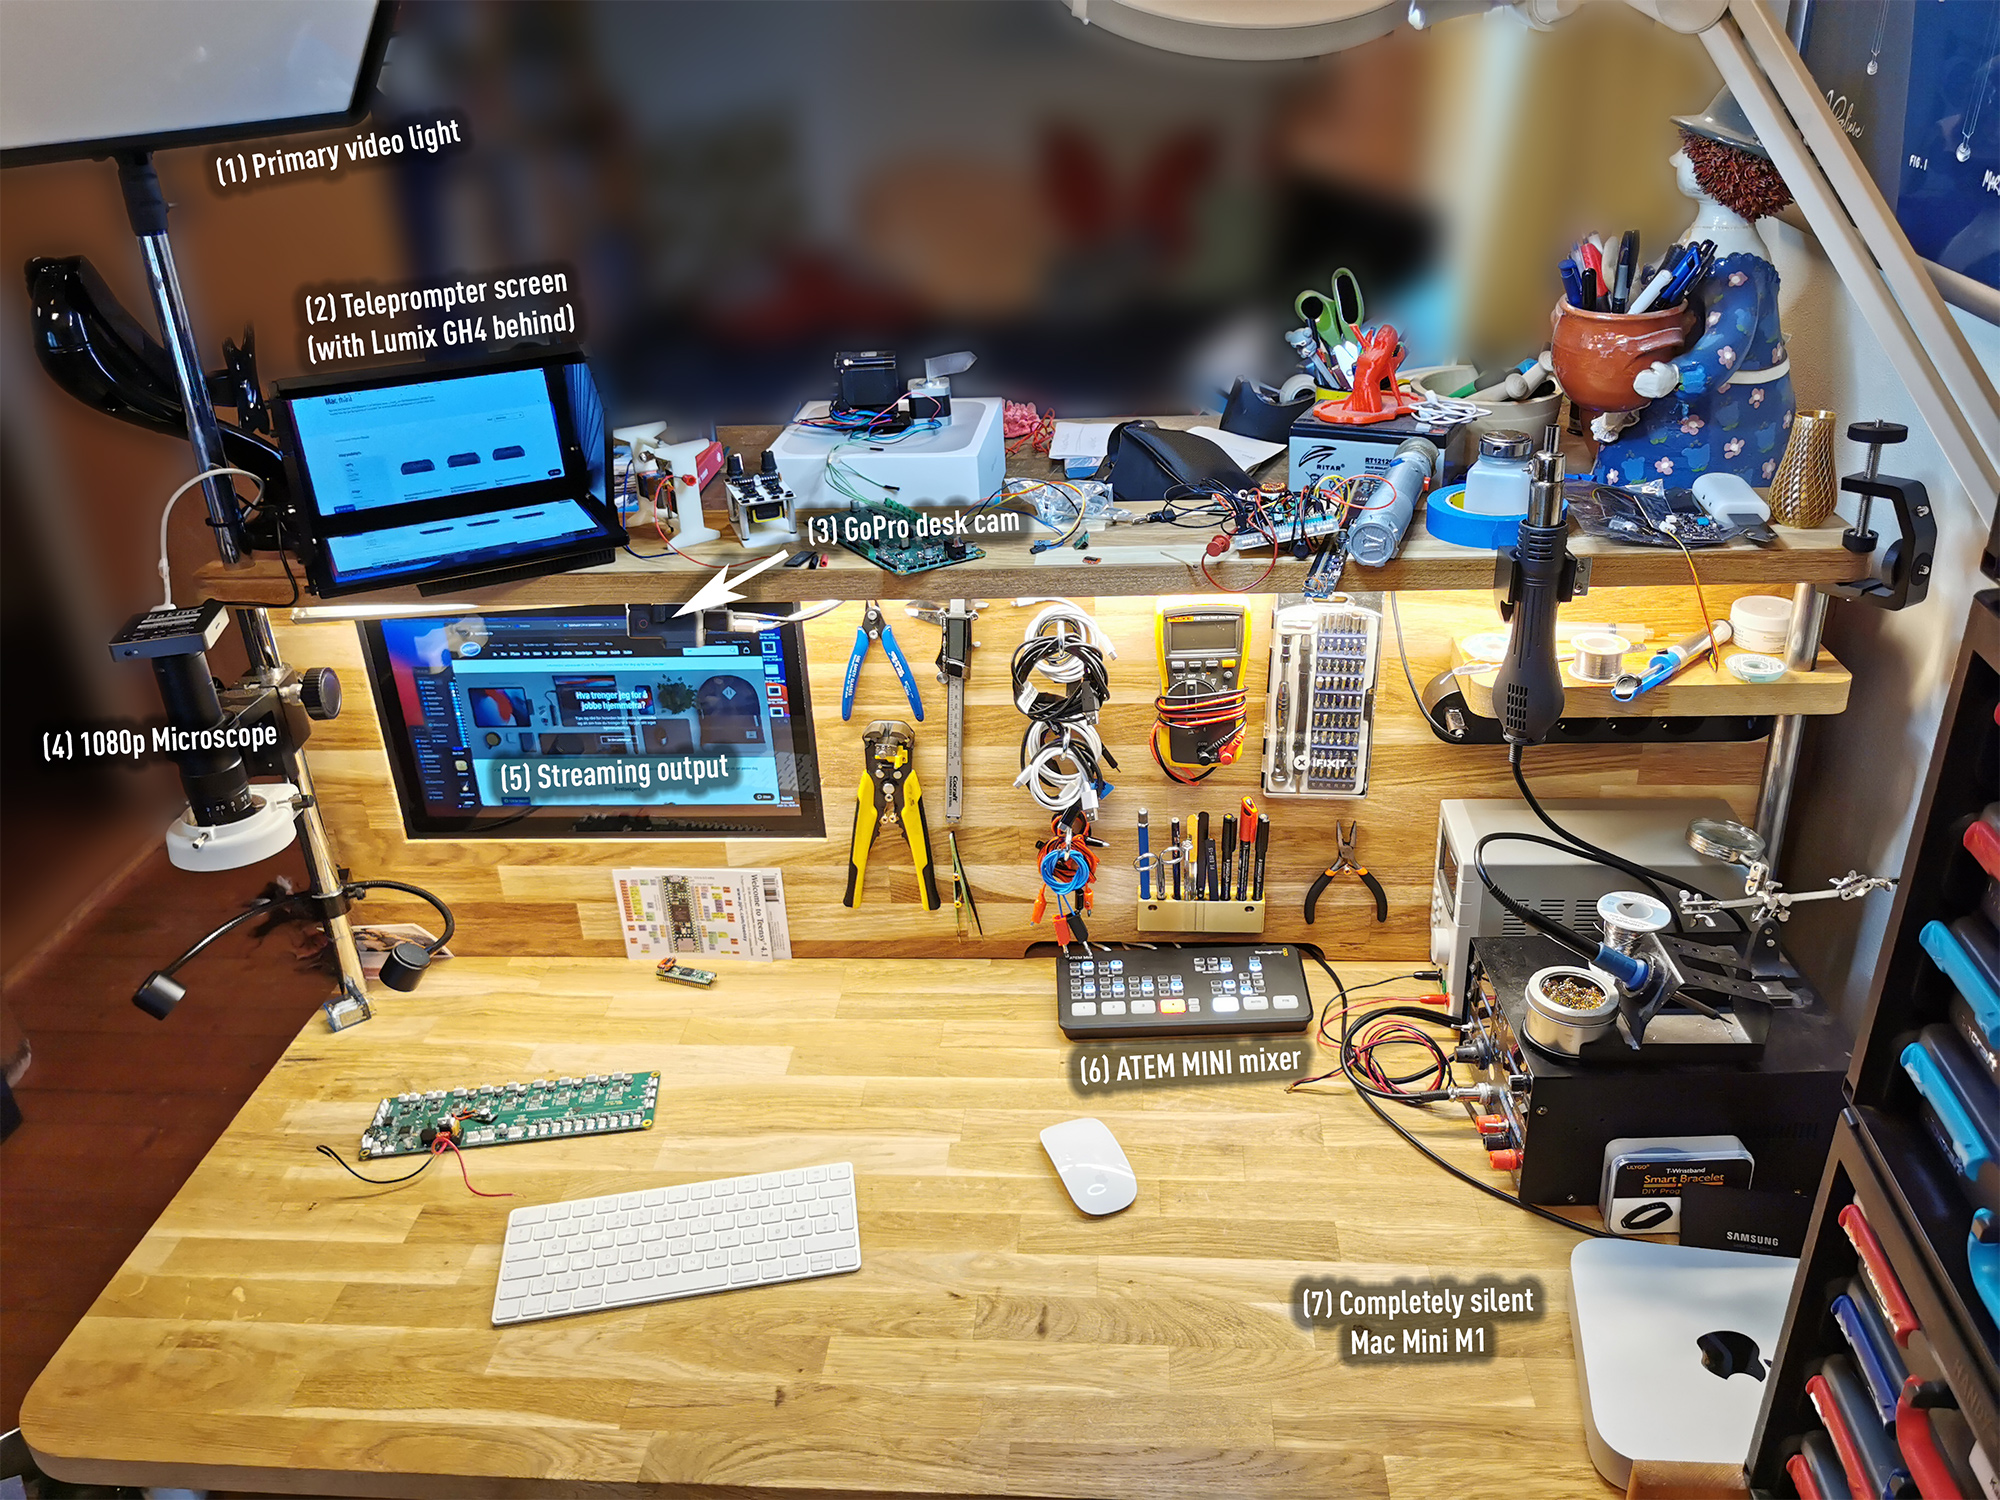
It took a while to find a suitable camera to show the desktop, but I found a GoPro 6 (3) at a reduced price since it’s not the most recent model. These can be setup to do a clean HDMI out and it has high enough quality that it will show most of the desktop. Keeping it constantly plugged in does not seem to bother it, though it does get hot over time. It’s so small that I could easily 3D print a mount just above the screen where it’s out of the way. To get closer in using this camera, I can bend down my flexible magnifying desk lamp (a must-have when working with tiny electronics!).
I milled a new back-wall for the desk, but could keep all the other parts of if, so the upgrade didn’t take too long. All the cables for the ATEM Mini mixer (6) goes out through a hole on the back, so despite having 4 HDMI sources connected, it all looks reasonable tidy. Initially I used my 15” Macbook Pro, but the noise from the fans are deafening once you plug in a second screen. When Apple launched the new line of M1 based machines, I instantly hit the Buy-button and completely solved this issue. I’ve had the machine (7) for a few months now and I’ve not heard a sound from the machine since other than the startup sound. Highly recommended for others with the same problem!
Note that I don’t have speakers on the desk. For streaming I always use a bluetooth headset with microphone that is connected to the Mac. This prevents almost all cases of audio feedback, so the students don’t need to be bothered with that.
How I use the setup
All the lectures are on Zoom, so I’m using the USB Type C output of the ATEM Mini as the webcam input in Zoom. That means that anything I put on the 19” monitor will be on the stream (it’s my “Program output”). During the lecture I’ll use the ATEM Mini to switch between the main camera (GH4 showing my head), my slide deck (Mac Mini M1), the desktop camera (showing hands on projects & hardware) and the Microscope (for looking at tiny things). I’ll often put my head next to the other views in as a PIP (Picture in Picture) and I think this makes the presentation look very professional.
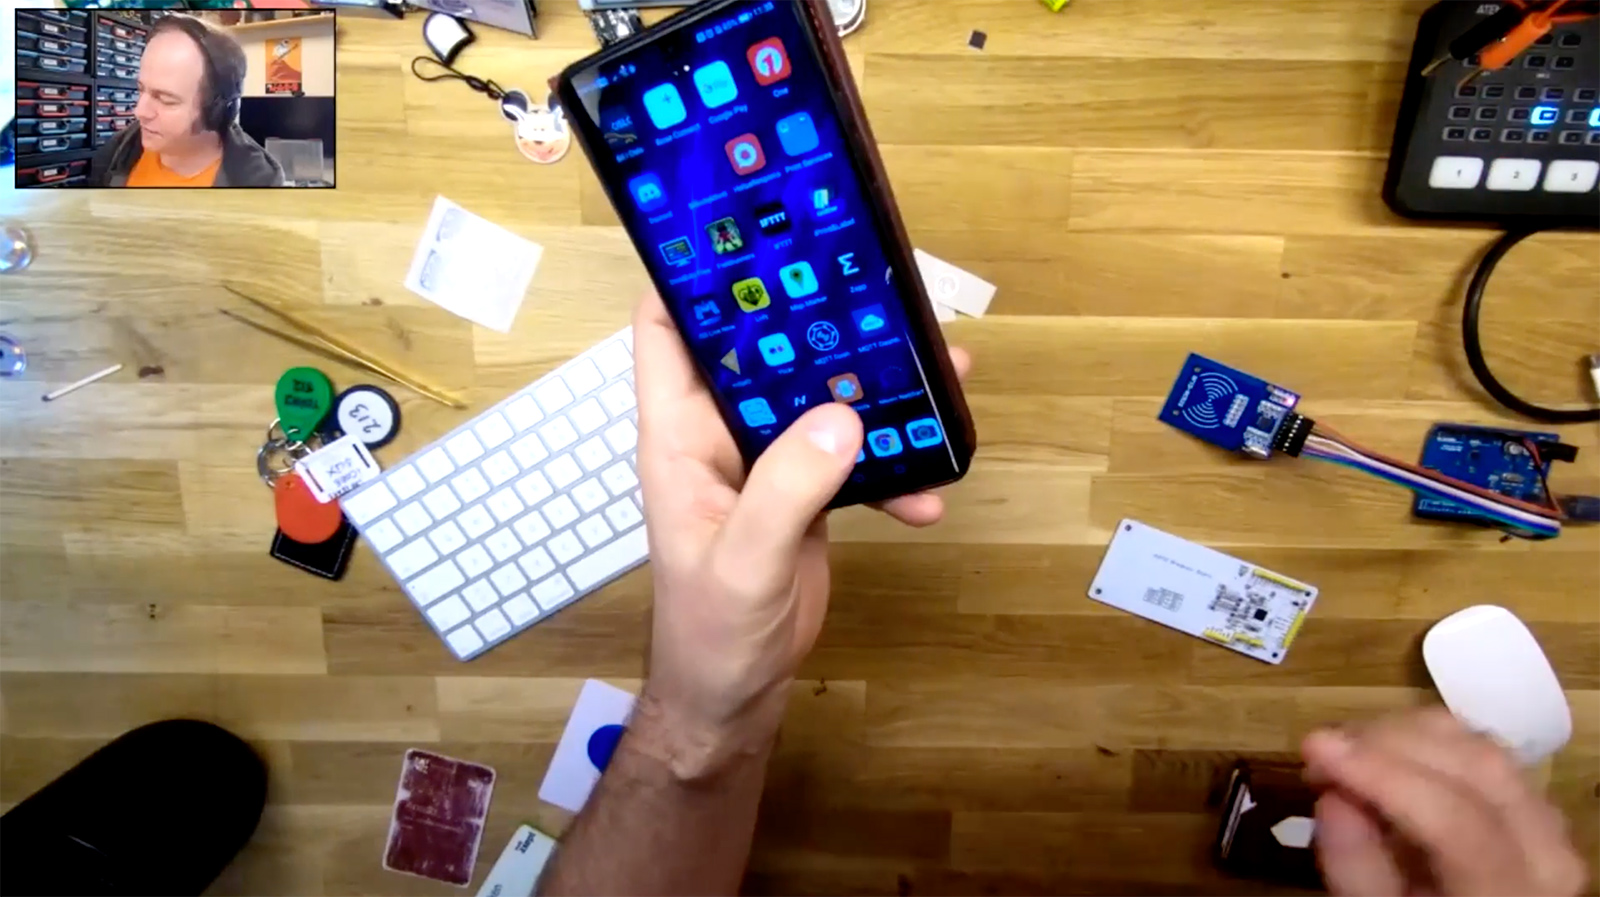
Above you can see how PIP works as I’m showing how to read NFC cards with an Arduino and RFID reader, as well as using my phone. Showing such demos would be hard in a classroom setting since we don’t have a desktop camera there. Normally, we don’t have a microscope so the students are getting to see things in new perspectives. This offers extra information that helps them understand advanced topics.
Why go through all of this?
I do up to 8 hours of lectures per week, so I wanted this be be a permanent setup. The equipment has cost quite a bit, but all these tools increase the quality of the lectures significantly. The Covid year has seen a lot of students drop out since watching a slide on a screen is much less engaging than taking part in a live lecture. By giving the students a more profesionally “produced” lecture that retains the ability to show the physical hardware, makes the lack of “hands on” experience much less noticeable. They’ll still miss the social interaction and there’s some things we just cannot do (such as the annual robot building & competition), but they are also getting quite a few things they wouldn’t get in a physical lecture.
One such thing is that whenever I talk about something, I can just reach behind me to take out hardware from the shelves behind me. I have a massive inventory of hardware and components in my home office that I don’t have when doing physical lectures at the University. I have logic analysers, oscilloscopes, benchtop powersupply, electronic loads, soldering gear & a lot of other tools I would not normally have, so overall I think this is better in many regards. The price of the ATEM Mini was $295, the GH4 camera was reasonably priced at $467 and the GoPro was about $150, so not too shabby for a complete streaming setup?
It also works great when working on client projects. I normally won’t use the Teleprompter screen. With my Macbook Pro out of the way, I can more easily fit test gear and parts I’m working on thanks to the new Mac Mini M1.