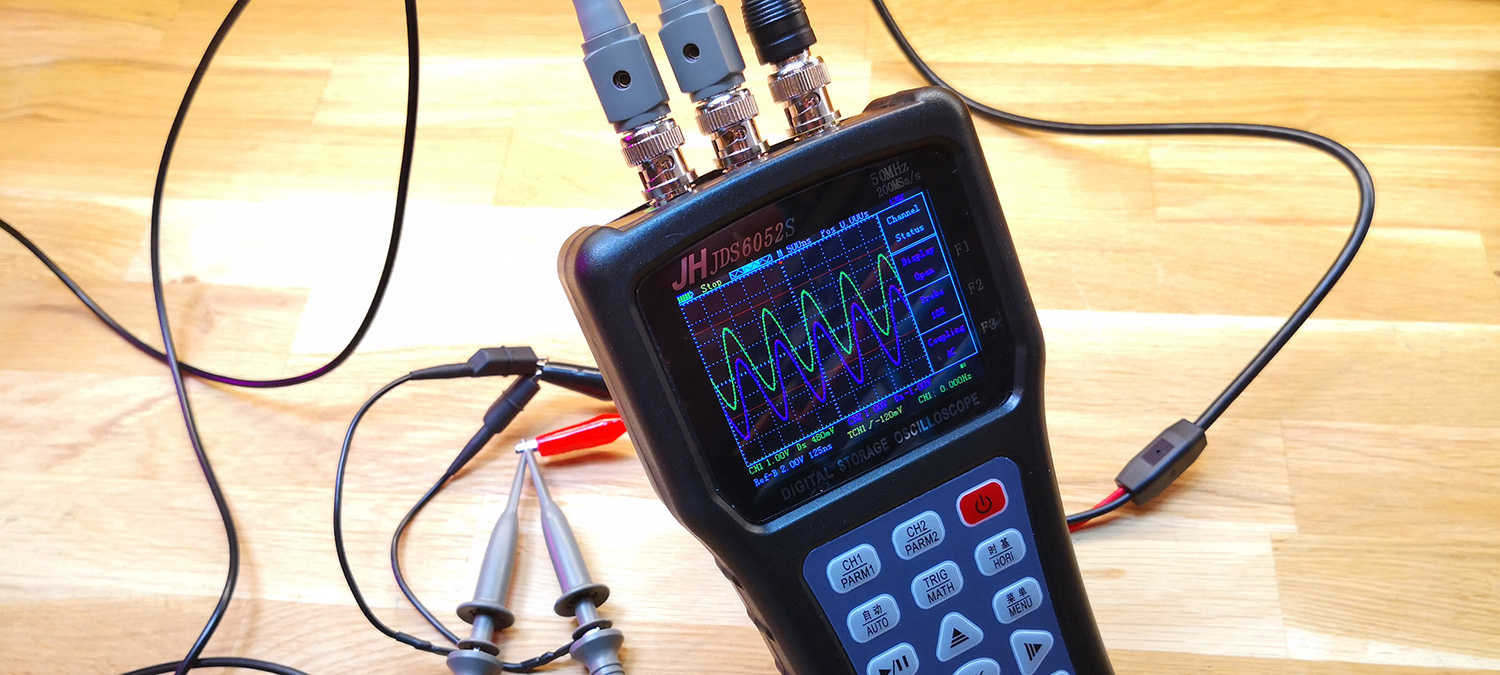
Jinhan JDS6052S Review - a 50Mhz portable Oscilloscope @ $100?
12 May 2020 at 7:44 pm
(YT direct link) Given that we all work from home these days, I really wanted to get hold of a handheld oscilloscope with decent specs. What I’m looking for is something that can be used to compare signals, see if a crystal oscillates at 25Mhz or to verify SPI and I2C signal quality. I’ll also be using it to troubleshoot power supplies and other things out in the field, so portablility was important to me. About a hundred USD was what I was hoping for.
I’m a big fan of Fluke instruments, but I just can afford to pay $2500 for a Fluke 124B. If I would be using this on a daily basis as part of my job, I might be willing to pay that much, but for home use its way too expensive. Just the official bag for this Oscilloscope will bust my budget, so this is not something to look at. I did however look at the UNI-T UTD1050DL, but $370 is still a little more than I’d want to pay for something I’ll only use every now and then and just to test very basic things. I looked at lots of USB scopes and quite a bit on the Digilent Analog Discovery 2. It could go to around 30Mhz, had a Waveform Generator, could work as a logic analyzer and much more, but the software looked a little limited for a $270 tool? I mean - at that price you can easily get an entry level 100Mhz bench scope from a good vendor? They offered educational pricing, so I sent them an email from my official University email and explained that I lecture Embedded Systems, but that wasn’t good enough for them to offer Educational pricing. Based on that, I wonder who can ever get their educational pricing but I digress. USB scopes also does not offer the best portability given that you’ll also need PC.
A $100 portable Oscilloscope?
Anything offered at my usual sources like Digikey or Mouser was either too expensive or too slow. I spent way too many hours browsing the web for possible solutions, but in the end I always ended up at sites like Aliexpress or Banggood. For many years I’ve looked at these small DSO Oscilloscopes. They’re portable, have nice screens and look pretty cool. The problem with these are that they’re all very slow. MSPS is short for Megasamples per second and it’s the main measure of how often an oscilloscope will test the voltage of a signal. So how many millions of samples per second can these cheap DSO scopes do? Typically not more than 1 MSPS.
A general rule is that you want to have a sample rate of 5 times the signal that you want to look at. This means that a curve would have at least 5 points to describe it. They could maybe be used to look at slow 100Khz I2C signals, but they certainly can’t see fast things such as full speed I2C, SPI or a crystal. This so called 50Mhz scope from Hantek can only do 150 MSPS, so it can only reliably capture 30Mhz signals despite claiming 50Mhz.
I then found that it’s a whole class of portable oscilloscopes that have the form factor of a large multimeter? That was what I wanted! Something that packs down easily when I don’t use it.
I spent almost two entire days watching Youtube reviews and reading written reviews of possible scopes. Yes - if you check other reviews on youtube, you’ll find that the ATORCH 5012H is too good to be true. In the end I had nailed it down to just a couple. I looked at the Hantek 2C42 and the Hantek 2C72. The reviews on these were a little mixed and it would be nice to have a Waveform generator integrated like on the Hantek 2D42 / 2D72 versions. The other scope was Jinhan JDS6052S and it was on sale for $103, had two channels, 200MSPS sampling, 3K sample depth and even a builtin Waveform Generator. It had higher specs and a better price. I even didn’t have to take the test - whatever that should mean 😊
One problem though - I could not find a single review of it anywhere. The fact that there were no reviews was a bit worrysome, but the price was actually just below my $100 target. I pondered it a week, looked at even more alternatives and came to the conclusion that at this price, I could take the chance and maybe even review it myself?
Unboxing
The package took just a little more than a month from China despite using Aliexpress official shipping, but hey - it’s Covid-time so many postal services struggle to keep up. It arrived in a slightly beaten up cardboard box, but looked unharmed. The box had foam inserts that seem to have protected it well despite rough travels for 34 days.
The kit comes with a battery charger with a very doubtful appearance. It barely hangs together and I won’t dare to put it in any 230V socket. It also would be very hard since the prongs don’t extend far enough for it to actually got into a European socket, so it’s basically useless. I did a brief teardown of it before throwing it away, and I have a better charger for such batteries. Might be worth getting for others though. The scope itself is kind of large? I have reasonably big hands and it has a good form factor for me, but someone with smaller hands might find it slightly too big to hold comfortably? I think it’s the same with all of these though. Its a tradeoff between screen size and portability. It has a nice protective foil on the screen as well.
There’s a battery compartment on the back with a sliding lock mechanism. Under the foam insert, there’s the remaining tools. A test cable with crocodile clips, a USB cable, a spare screen protector, a mini CD that presumably holds the manual? A set of two probes with 1X / 10X attenuation, a standard pen with company advertising on. Lets have a look at that manual.
It has nice screenshots and tell in English what each meny item is and what the Function buttons do on each screen. Useful, but not very extensive. It lists the specs at the end of the manual. Not much more to see and I didn’t expect much more either.
It did not come with a 18650 battery, but I happened to have one. It looks like it can fit cells both with and without protection chip. I added the crocodile clip probe and turned it on. Looks good? Not very long startup time either. I played around with it a bit and it looked decent. Powerful beep on click that is easy to turn on/off. The interface certainly isn’t intuitive, but after playing with it for about 4 hours, I feel that I have a fairly good hang of it. The Auto function sure saves a lot of clicks, so I’ll likely use that a lot.
The device itself looks very “cheap”. There is no rubber - just a hard plastic casing. It’s quite lightweight and the membrane buttons feel “cheap”. Then again - this IS a cheap Oscilloscope, so I did expect that. There are two Oscilloscope connectors at the top of the device as well as one for the Waveform Generator. I haven’t tested, but I’d guess the screen is just plastic. The screen comes with a screen protector and I suspect the reason is that this is much cheaper than providing a higher quality glass. There is a USB connector on the side, but this is not for charging. It’s only for doing firmware updates. That’s a shame since the supplied charger cannot be used given that it does not fit in European sockets. Would have been much more elegant if it came with both a battery and a charger chip. I think that might have been cheaper for them? The builtin quickstand works fine.
The probes are quite standard. You have these colored rings that you put on the probes to keep track of which probes go to what input. The rings just click on and are easy to swap out. The probe has a crocodile clip for Ground connection, you can take off the outer part for probing small components, you have a switch for selecting the attenuation (1x/10x) and you can grab cables and other things to test by pulling back. The probes feel a little cheap, but that’s to be expected as you can easily find probes that cost more than this entire scope - for just a single probe. I have some of these at work and they are a completely different level. I wouldn’t trust these probes for speeds above what the Oscilloscope itself can work with.
Test setup
I borrowed a 200Mhz Agilent scope from a friend. It’s a little worn so one of the encoders barely work, but apart from that it does a great job of displaying signals. I also used a cheap Waveform Generator, the 6600 from Feeltech. This can certainly generate signals, but it isn’t a precision instrument. It’s good enough for this test though.
My first tests were probing the 16Mhz clock of an Arduino Uno. The Agilent obviously locks on to the signal quicly and the knobs make it easy to adjust the signal so it displays properly. With the JDS scope it takes quite a bit longer to get it right if you adjust it manually. With portable tools, you can’t just add a button for every function like large Oscilloscopes have. Every button will have to do multiple jobs. The arrow keys will move & scale things. The right of the screen has 4 squares with text in them. The first is the title and the other 3 tell what pressing the F1, F2 and F3 buttons will do at any given time. It’s not very elegant, but it works.
Probing a small Olimex board, it was quite easy to find the PWM signal and have a look at it. Getting to the right values sure does take a lot of clicks. It does the job. In terms of triggers, it can trigger on either a rising or falling signal. It can trigger contiously or just single shot.
Testing with a Function generator shows that it really does live up to it’s spec. The triangle wave looks the same on both the Agilent and the JDS for all types of waveforms. On a normal scope, you’ll often use the knobs rather than the Auto-feature. On a portable device like this, you’ll save a ton of time using the Auto feature. The autodetect feature is claimed to work from 50Hz-20Mhz, but that’s primarily for sine-wave signals. The scope will show the signals just fine, but it can’t always autodetect them. This square-wave doesn’t look all that square when we increase the frequency, but we can see the same shape on both scopes.
Here we’re scrolling up through high frequencies from 12Mhz and up to 30Mhz. This generator only goes to 30Mhz, but the JDS6052S has no problem detecting a 30Mhz Sine wave also. The Agilent obviously does not have any problems either, given that it can go up to 200Mhz. Scrolling down through some lower frequencies, you can see that the JDS depends on having a full wave visible on the display to auto-detect the frequency, whereas the Agilent has no problems whatsoever. One thing to note - here I’m only using one channel, so I have the full 200MSPS. If I was sampling two signals at this speed, I would only have 100MSPS per channel, so that would mean that 20Mhz would be the maximum I could capture with the JDS scope.
I should also mention that the 320x240 pixel screen has a Screen capture option that is rather well hidden. Clicking the main Menu button 4 times, you can open the screenshot interface. It is not documented, but click the OK button to grab a screenshot. To get the scope to show up on your computer, you’ll have to set it in UBOOT mode. This is the mode used for firmware updates and it will make the device show up as a USB drive holding glorious 320x240 pixel bitmaps. This works, but it’s much easier to take a picture of the screen using your mobile phone. Then again - this is seldom a good feature of any low price scope since it’s based on the resolution of the screen.
The device has a dedicated Language-button that will let you toggle between English, Russian, Spanish, Portuguese and Chinese.
One thing you may have noticed, the scope does not have a calibration connectors? Well, given that it has a builtin Waveform Generator, it will do the same.
Waveform generator
The generator can do up to 5Mhz sine-waves and 1Mhz triangle, square and sawtooth waves. The Squarewave can be adjusted for duty cycle if you need that. It will output signals at up to 8 volts and it can offset the signal. It doesn’t look like the signal drops in voltage at higher outputs either, so that’s good. This is enough to be useful and it’s quite precise too based on what the Agilent scope shows.
Pros:
- 200 MSPS for $100 is a very good price
- Surprisingly, it does what it says
- Comes with the probes you need
- Portable
- Good battery life
Cons:
- Many clicks to do things compared to a traditional scope
- Not much history with only 3k samples
- Sometimes have a hard time classifying a signal
- No battery, though 18650’s are easy to find these days
- The battery charger is worthless. Get a better one.
- Limited trigger options
Overall
I’m actually surprised that I didn’t find any severe shortcomings on this device? The measurements are of of higher quality than I had expected, I can easily measure both DC and AC signals. There are obvious shortcomings in terms of looking at very low voltage signals and it can’t show anything sensible for signals below 100mA but that’s within the spec. Compared to the Agilent, it obviosly does not sample as often, but this is only visible when sampling very slow signals down in the Hz range.
A small disclaimer: while I do make a living from making hardware & software, I have limited experience with debugging analog circuits, so if you’re a seasoned Oscilloscope user and you think I forgot to test something on the scope, leave a comment at the Youtube video above (no comments here) and I’ll do my best to check it for you?
Update/addition May 19th 2020:
I just received my 60Mhz Waveform Generator and the JDS6052S can only display the waveform correctly up to 30Mhz. If can detect the frequency up to 45Mhz, but the waveform display is useless beyond this. With 200MSPS, that is expected since you should have at least 5 times what you want to sample. So all in all - not too bad? I have posted still pictures from this and some requests on my Flickr https://www.flickr.com/photos/flashmagazine/ A full writeup is available at https://flashgamer.com/blog/comments/jinhan-jds6052s-review-a-50mhz-portable-oscilloscope-100