LX9300H Happy Birthday song module
14 June 2020 at 12:01 pm
Every now and then I’ll make gifts using the laser cutter or CNC at Bitraf. Sometimes it would be fun to make it so that when the gift is opened, a birthday song is played. The obvious thing to do is of course to just buy a gift card from the shop and scavenge the parts, but where’s the fun in that? Why not make a DIY project out of it? This is is super easy to do with just a few parts and a soldering iron.
This is one of those I just stumbled upon when looking for something else. Nice to have when they are less than $3 for 10 modules, right? I couldn’t find much info on how to use it, so I figured I’d do a quick video & writeup showing how to set it up and what it sounds like.
Hooking it up
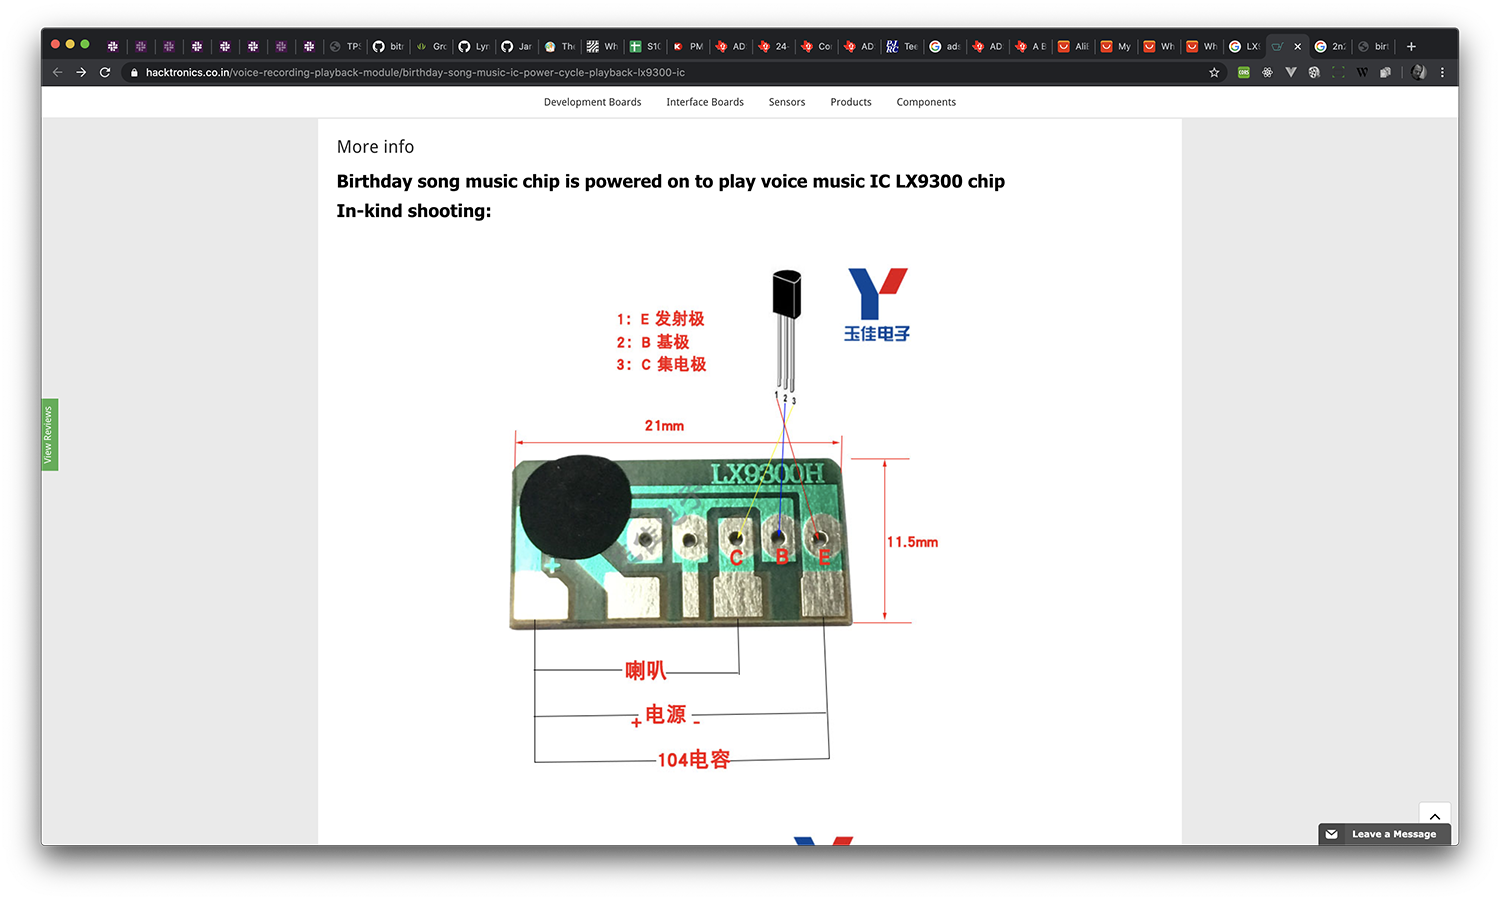
The module is made to be slotted into a connector of some sorts, but can easily be soldered also. None of the sellers on Aliexpress offered a connection diagram, but Google Image search is your friend. I found a website that offered a reasonable schematic on how to connect it - but in Chinese. According to the website “Birthday song music chip is powered on to play voice music IC LX9300 chip In-kind shooting”? Right…. Gotta love Engrish 😉
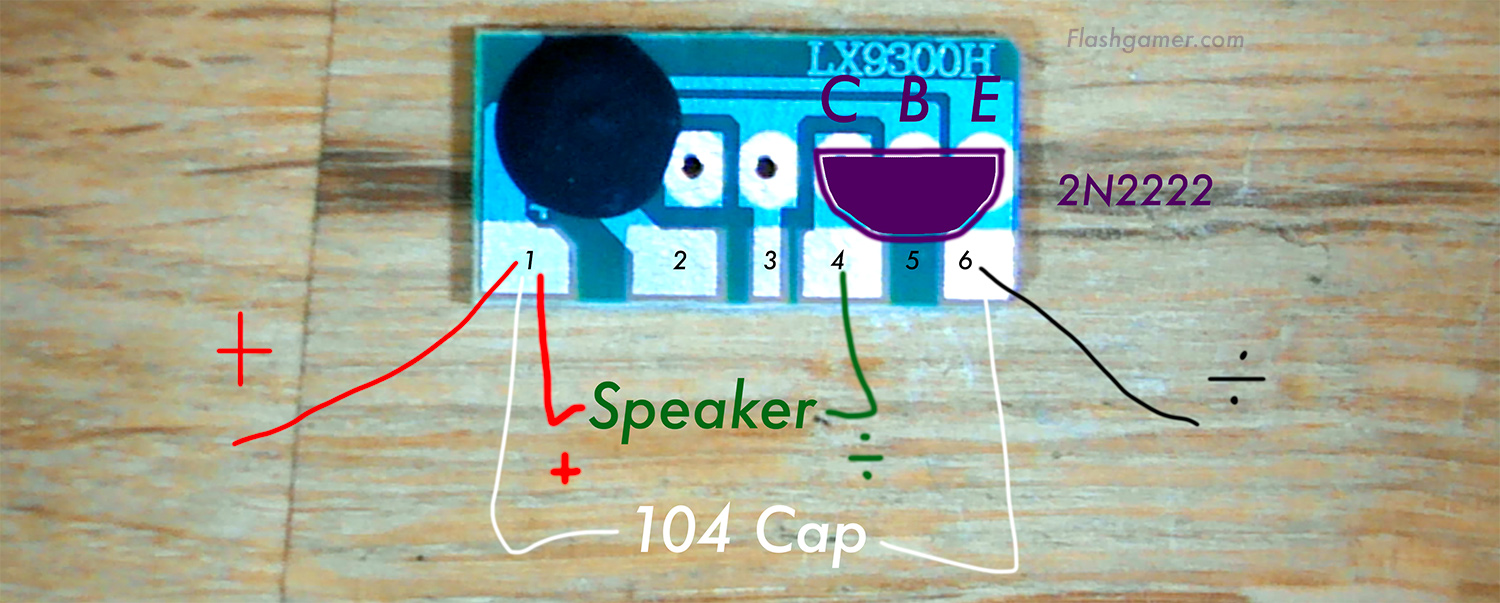
But if we extract the information here, we can see that we’ll need a 104 capacitor (0.1 μF) across the power input (Pin 1 + 6), a speaker connected to pins 1 + 4, a NPN transistor on the pins 4,5 +6. Pin 3 is not used, but given that it’s connected to the Base (B) of the transistor, it can likely be used to adjust the triggering of the sound. No idea what Pin 2 does.
There are no specifications on how to power this module, but given that it’s intended for gift cards, anything between 3V and 4.5V should be fine. Soldering the components and wires are pretty straightforward. If you would want this to trigger when a box is opened, you just solder in a switch on the power connection.
Testing it
After soldering, I tested with a few speakers I had in my box of audio components. The circuit can drive surprisingly large speakers. The first I tested was a 8Ω/1W speaker. The next was a 4Ω/3W speaker.
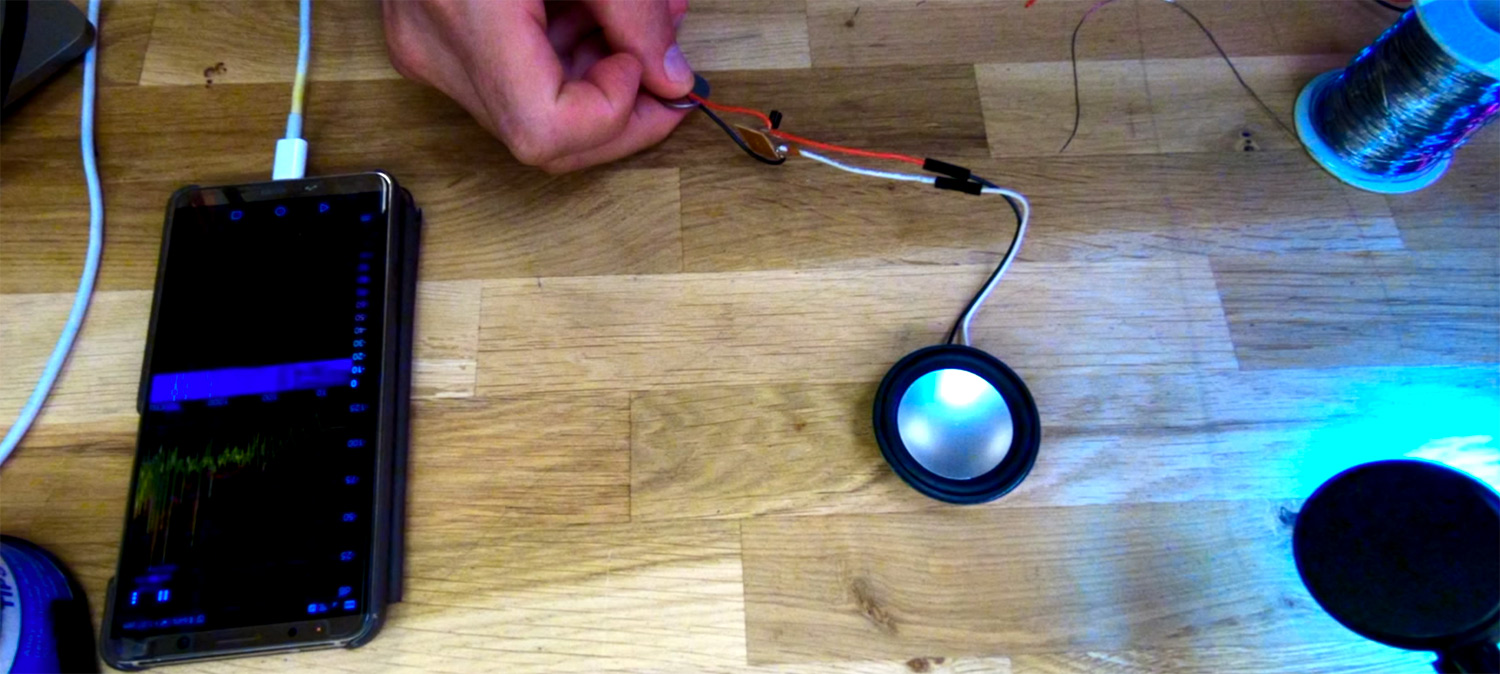
I then tested some tweeters/buzzers. Most of these worked fine, but the audio became amusingly distorted using some of them (see the video). Some of these were surprisingly loud, but I think small speakers like these from Adafruit are better suited.
All in all, fun Sunday soldering project. Dirt cheap and easy to integrate into projects.